|
| C
O N S T R U C T I O N L O G |
|
| O
C T O B
E R 2
0 0 4 |
|
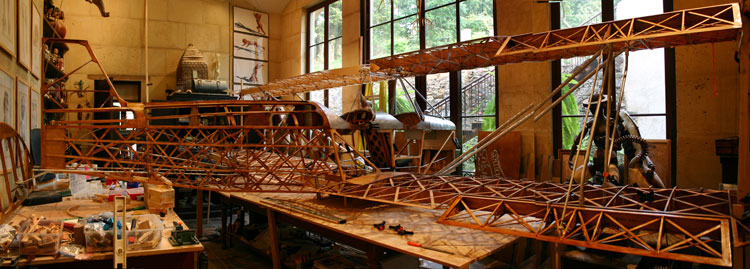 |
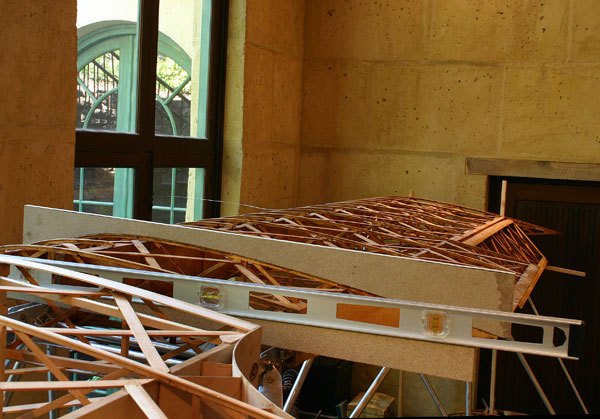
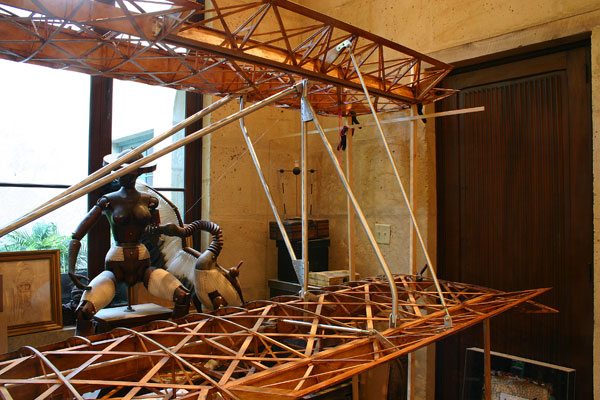
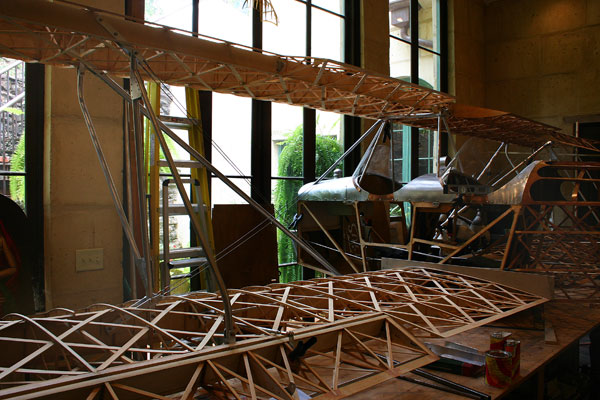
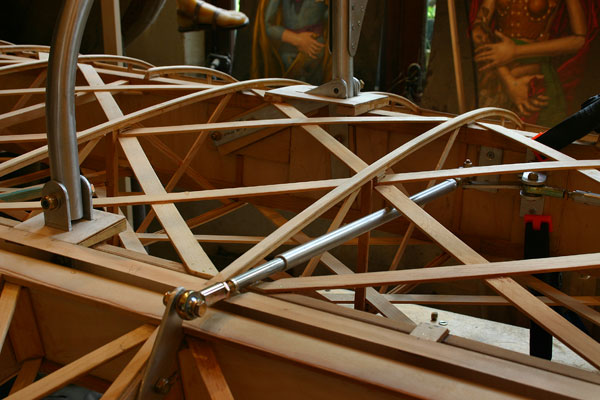
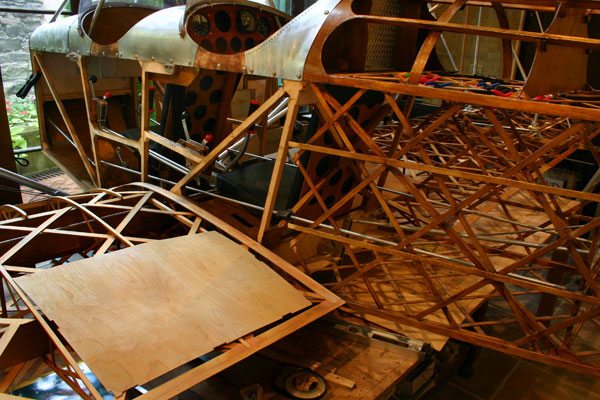
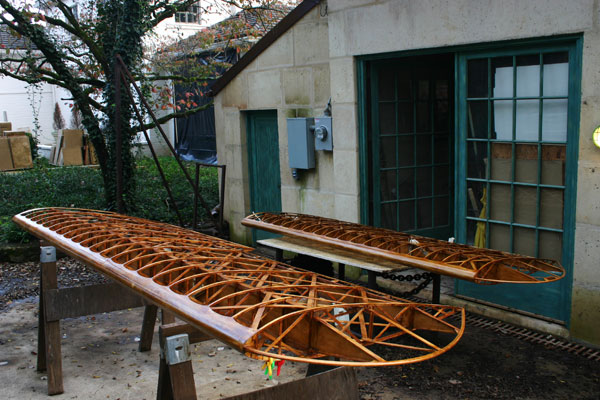
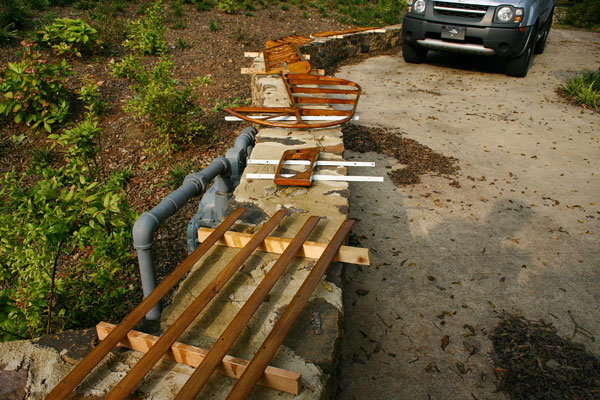
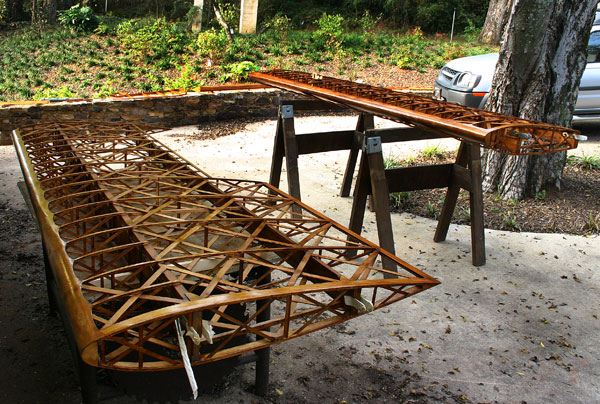
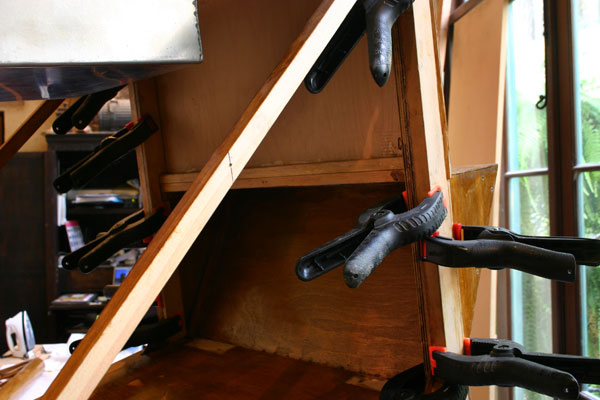
| The
whole plane together in the studio. Wings on, and riggin' away! |
|
| 2 |
Went
down to SERFI in Evergreen today. There was not a whole lot going
on, and only 5 biplanes total, 2 STARDUSTERS, a STEARMAN, a little
RAGWING SPECIAL, and a 1941 TIGERMOTH. These last two were worth
the trip actually. I looked at fittings , struts and cables. |
|
|
|
|
| 3 |
|
The
angle of incidence of the top of the cabanes checks out at
exactly 2 degrees with the wedge jig, but the wing itself
shows a little more with my custom airfoil jig. The difference
of incidence between the upper and lower wings is a correct
2 degrees though. I am considering giving the wings a little
washout by setting the tips at 2 degrees.Will ask Gene about
that . |
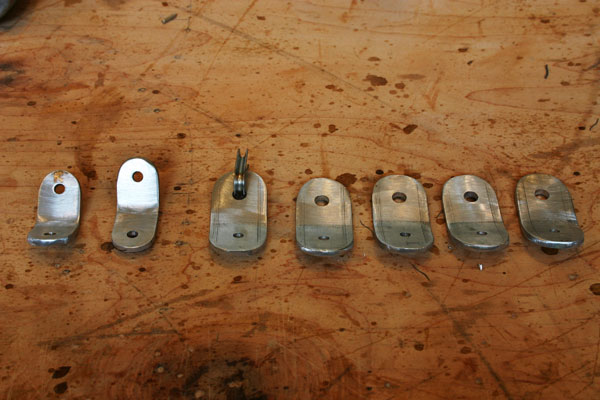
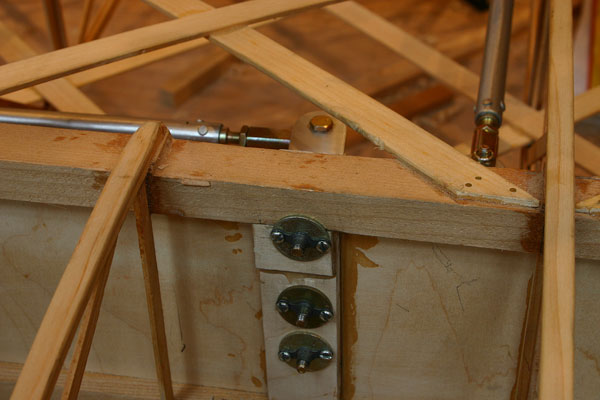
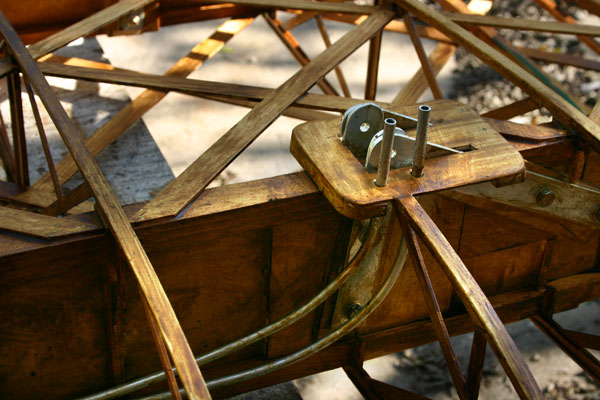
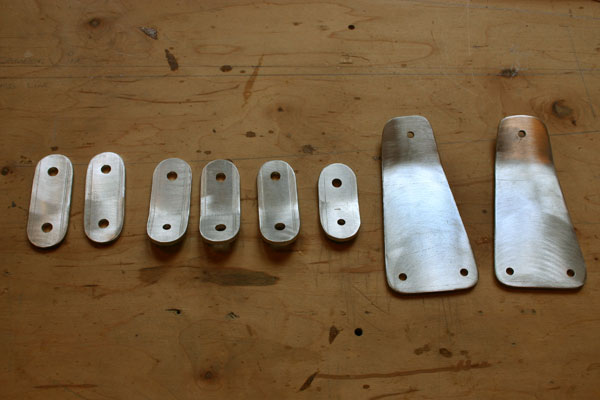
Drilled
plates for 1/8" rivets and attached them to the middle
leg of the N strut. I will hold off the attachment to the
other strut tubes until I talk to Gene.
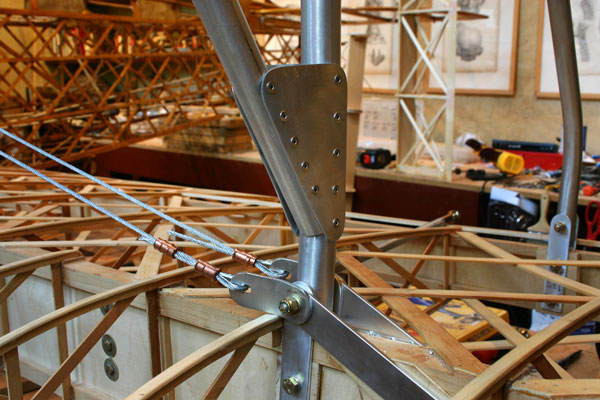
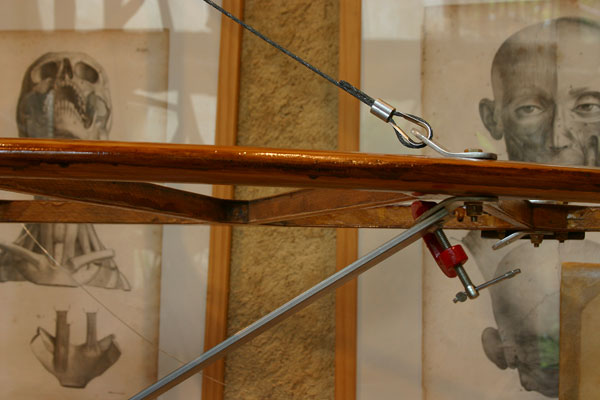
Made
4 cable ends looped though attach plates with copper Nicopress
sleeves. |
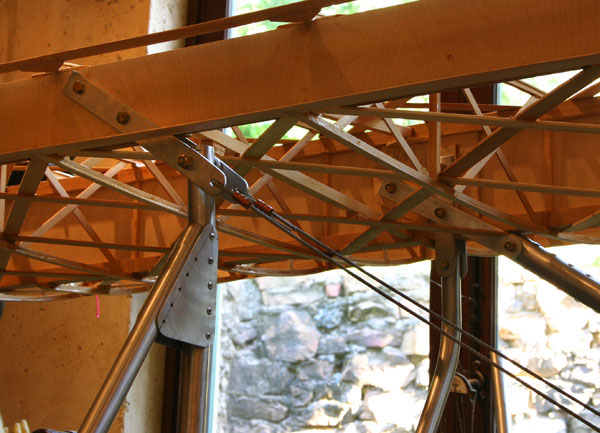
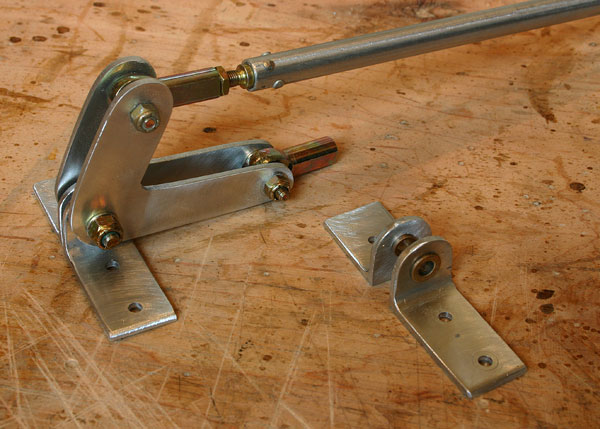
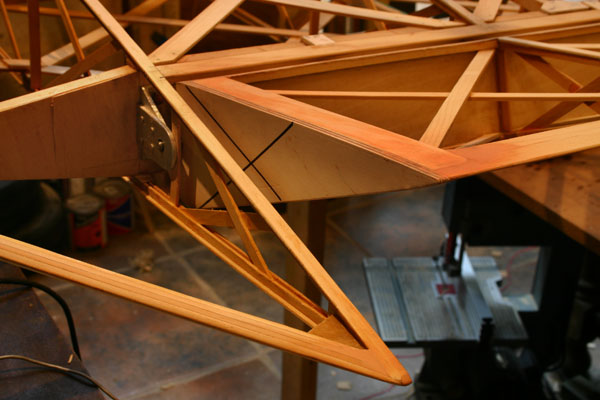
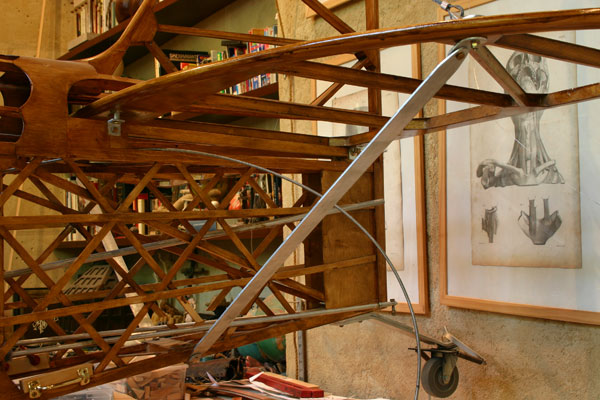
| I
don't like the look of the rear wing strut. The front strut
alone looks OK, but adding the rear one somehow clutters up
the look. So I made some 1/8"x1" slightly bent attach plates
to attach cables to gear end of main strut in order to replace
rear strut with 2 flying cables . I would use turnbuckles to
adjust the tension of course. I looks a lot better, but
I will have to run this by Gene to morrow. |
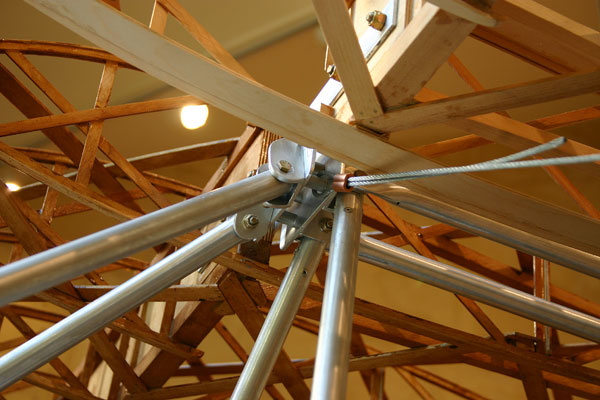
| It
is not clear from the blueprint whether the landing wires attach
to the front or the rear plate of the cabanes. Gene said the
front, but I find the cables would tend to rub on the bottom
of the root rib. Also, they run at a slant. Attaching them
to the rear cabanes plate would make them parallel to
the wing. |
|
|
4
hrs |
|
|
| 4 |
|
Gene
said, in his usual "keep the answers short" style: angle
of incidence, no problem ; flying cables to replace rear
strut, OK; landings wires, to the front of cabanes .They
use a little L shaped bracket where the cables rub against
the root rib. I would prefer no rubbing, and will design
an attach fitting.
I
finished drilling and riveting the strut plates, after
cheching squareness and equidistance one more time. |
Made
and fit ailerons push rods with 1/4" threaded rod ends
riveted with two 3/32" battering hard rivets and 1/4"Aurora
MW4 rod end bearings.Used brass bushings to use AN3
bolts in the 1/4" bores. Had
to notch wingwalk supports to fit push rod in right
wing. The distance between the holes in the aileron control
horn was not sufficent to fit Aurora bearings , so I
had to use the clevis forks. All right side aileron hardware
is now connected and working . As noted before , deflection
of top wing aileron is more than lower wing aileron. |
| Fit
the new pair of bellcranks Gene sent in the lower left wing
and installed the push rods. |
| Installed
stabilizer level and equidistant from firewall , wing main
spar , wing tips and top of rudder post. Drilled for AN3
bolts and attached with spacers on front and large washers. |
|
|
6
hrs |
|
|
| 5 |
|
Mounted
a 2 lug AN366F fiber nut over a large washer with 2 small
screws on the inside of the ailerons root rib, to screw
in a hinge bolt. That will be easier the using the pin
and reversing the hinge as I did the first two ailerons.
I will go back and do those the same.
|
Sanded
the nose ribs of the last 2 ailerons and the notched the
ribs1/32"so the nose skin will be level with the ribs.
Varnished the inside of the leading edge skin of the last
2 ailerons, after marking the glue lines. Glued them on
and held them with masking tape. |
|
|
4
hrs |
|
|
| 6 |
|
Picked
up Dick Simpson and brought him over to look at the plane.
We talked a good while about all the systems, and he answered
a number of questions. I also looked at his Tiger firewall
and engine mount. The vertical front members are doubled
, and there is a 3/8" plywood plate to back the washers
on the bolts. The mount has 2 vertical 3/4" square tubing
and horizontal ones too. The rest is 1/2" and 3/4" steel
tubing. |
Before
I drill for the aileron control horn, I am considering
moving it up a little to increase the lever arm. That would
prevent the push rod from rubbing , and increase the lateral
movement of the stick. |
|
|
4
hrs |
|
|
| 7 |
|
Prepared
order from Aircraft Spruce.
Fitted
lower left aileron horn as exactly as possible as the right
one.
I
thought at first the stick could travel more sideways,
but after sitting in the cockpit, I decided it was about
right.
Glued
plywood blocks to the back of the rib geodetic where the
horns attach so the big flat washers have a flat surface
to press on. |
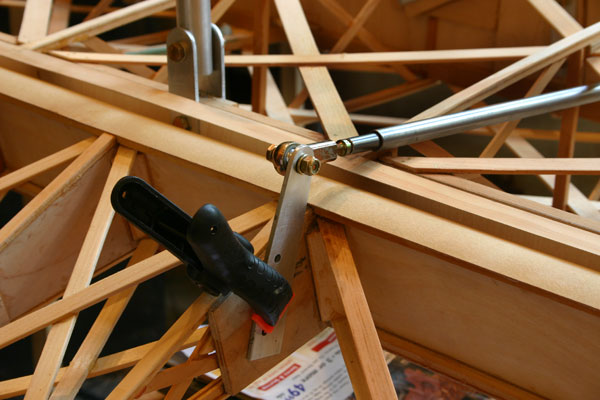
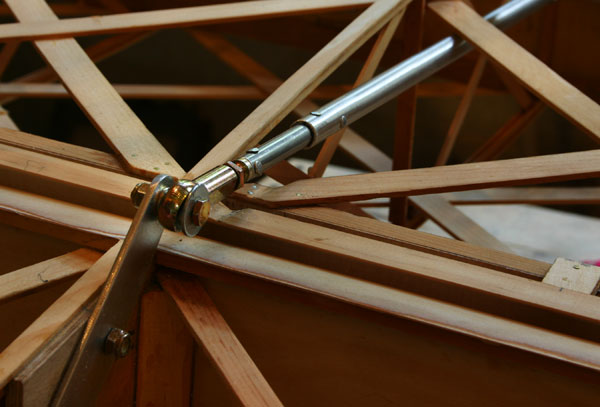
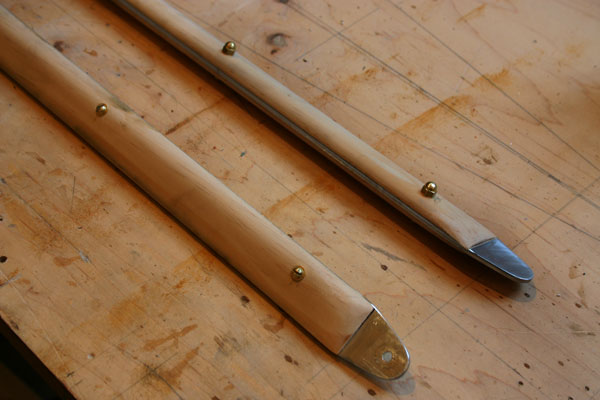
I
don't like the 8 struts holding the tail together, and want
to use only 1 front lower strut made of a flat 3/16"x3/4"
aluminum sandwiched between two pieces of spruce shaped for
streamlining, and replace the others with 3/32" cables and
turnbuckles.
Sanded
and spackled last 2 ailerons. |
|
|
4
hrs |
|
|
| 8 |
|
Sanded
ailerons and put them in the wings.
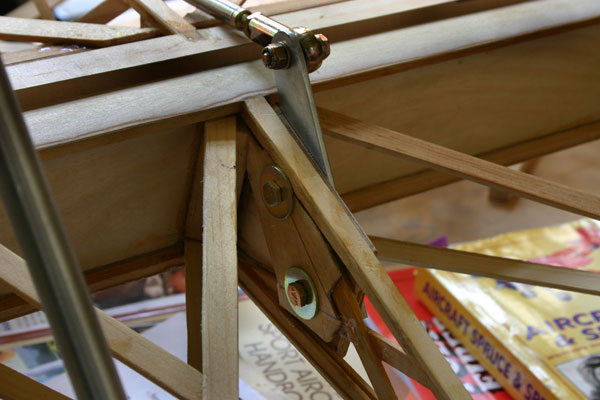
Made
attach brackets for cables on tail section out of 1/8"x1"
aluminum bar. The cable thimbles go through the 1/4" holes. |
Made
re-enforcing plates for aileron hinges out of 1/8"x1 1/4"
aluminum flat bar., and riveted them on the back side of
the hinge brackets with four 3/32" battering rivets. Drilled
both hinge and plate 3/8" and inserted bronze bushings.It
is much stronger now. I did not feel safe having only 1/8"
or so of aluminum around the bushing.
I
attached the hinges back using a 2 lug nut attached to
the back of the rear spar with two small screws over a
drilled oversise washer. That way,the hinge brackets can
be installed from the outside, and there will be no need
for an access plate in the wing. |
|
|
3
hrs |
|
|
| 10 |
|
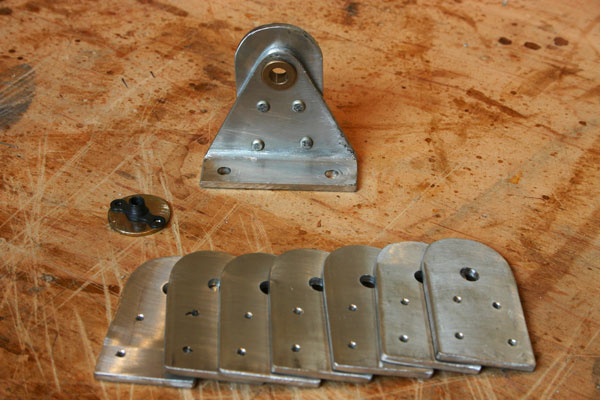
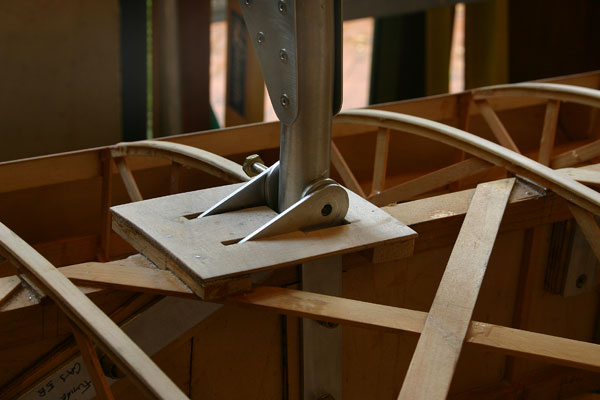
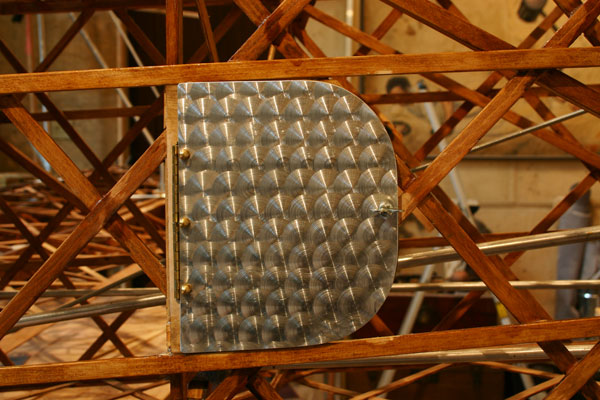
Made
raised wood mounting plates around the N strut attachment
brackets to trim the hole neatly with a fitted metal plate
after covering.
|
| The
aileron push rod rubbed too much on the trailing edge of
the aileron bay. Notching it is not sufficient. I will have
to use a 2 1/2" long reduced diameter 3/8" section
, and raise the bellcrank as close as possible to the top
of the main spar. |
I
felt the aileron bay trailing edge was too flimsy, and
would bow under the pull of the fabric covering,
so I added small plywood supports in between ribs . Big
difference. |
|
|
5
hrs |
|
|
| 11 |
|
Glued
the rest of the aileron bays braces .
|
Modified
aileron hinges with bronzed bushings and 1/4" axles. The
bushings touch in the center , everything fits tight ,
and the bellcrack turns freely. |
|
|
4
hrs |
|
|
| 12 |
|
Trimmed
all four aileron bay trailing edges so ailerons move 22
degrees up and 18 degrees down( those are the current specs),
and there is still about 1/8" clearance at full travel.
Upper wing ailerons travel is a little more. |
Moved
bellcranks as far up as possible on the front spars. Glued
3/8" plywood blocks to the front of the spar to make
it flush with the spar cap. Plugged previous holes with
dowels. Attached brackets with K1000 lug nuts screwed down
over drilled AN970-3 washers. |
|
|
6
hrs |
|
|
| 13 |
|
Worked
on last aileron bay.
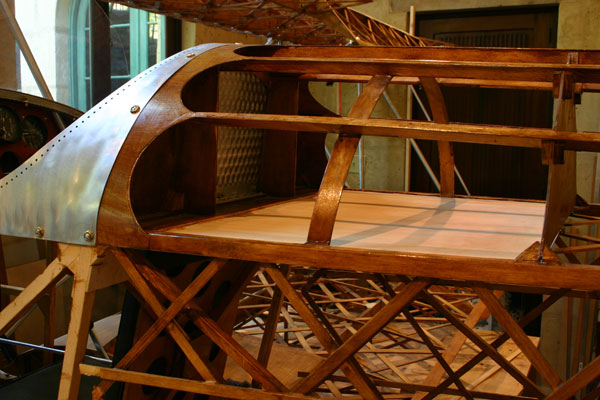
Cut
floor for luggage compartment out of1/16" plywood, notched
to fit. Glued
some 1/2"x1/8" strips to geodetic to get a level gluing
surface. |
Finished
left pushrod and linked all ailerons. They work pretty
well. A little lateral play in the stick will have to be
tightened up with a bushing.
Added
a 1/8" ply gusset to the back of the fuselage handle blocks.
Strapped
trim cable bowden sleeve to bulkheads . |
|
|
5
hrs |
|
|
| 14 |
|
Installed two
1/4" aluminum pitot lines from root to front strut plate.
Removed
lower left wing. |
Sanded
and re spackled rudder smooth.
Glued
in luggage compartment floor and weighted it down to dry. |
|
|
5
hrs |
|
|
| 15 |
|
Varnished
last two ailerons, rudder, and one side of lower left wing. |
Made
the rest of the wire attachment brackets out of 1/8"x 1"
aluminum.
Made
the two tail struts out of 1/8"x1 1/4" aluminum. They will
be stiffened by 2 streamlined varnished wood strips . |
|
|
5
hrs |
|
|
| 16 |
|
Made
1/8" plywood plates around the attach points of the top
left wing, with wood supports so they are level with the
ribs. |
Varnished
one side of top left wing, and other side of rudder and
trim tab.
|
|
|
5
hrs |
|
|
| 18 |
|
Varnished
other side of top left wing with a brush. It takes for
ever. So I decided to try spraying the rest.
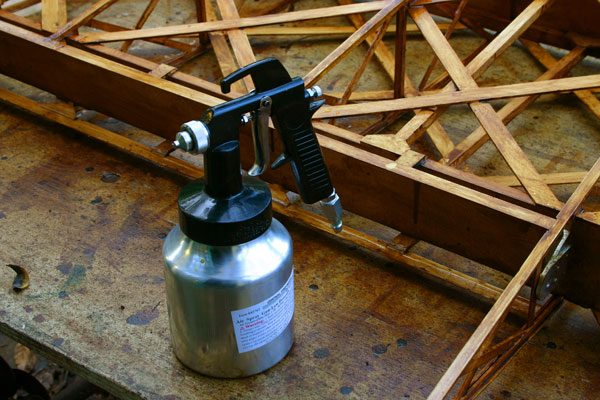
I
replaced my air regulator/oiler/filter unit that was
leaking badly, and bought a cheap basic low pressure spray
gun at Harbor Freight for $11.99 on sale. |
Well,
believe it or not, it works fine for my purpose, which
is spraying varnish on a bunch of little slats and ribs,
with as little overspray as possible. In fact, I went to
get a second one to have a spare canister of mineral spirits
to clean it between
uses. It is so basic there is really not much to clean.
Sprayed
one side of last 2 ailerons after a final sanding with
220 sand paper . Turned
the fan nozzle horizontal and reduced flow to minimum to
limit waste. Tu |
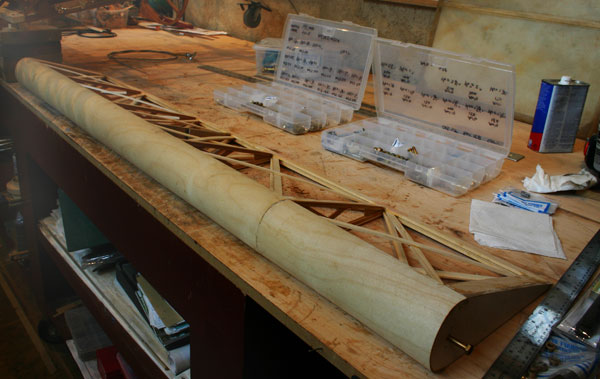
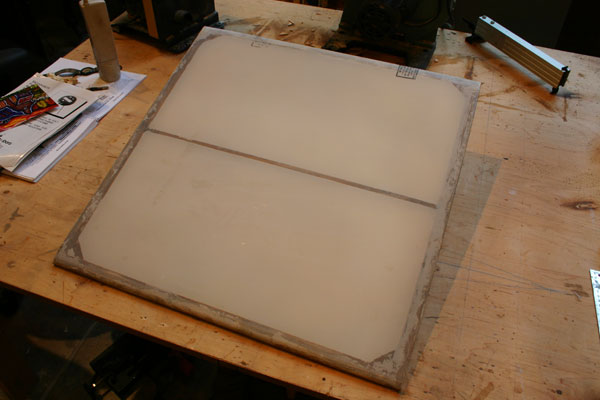
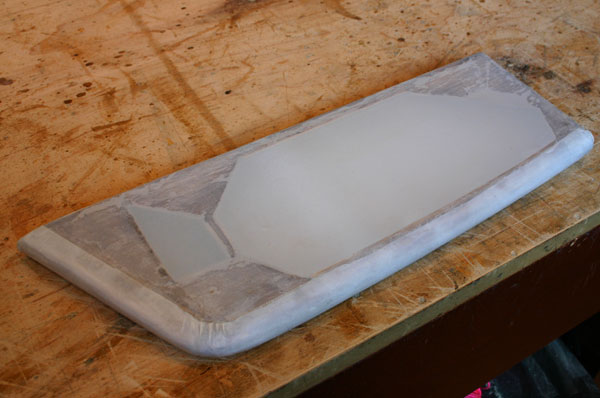
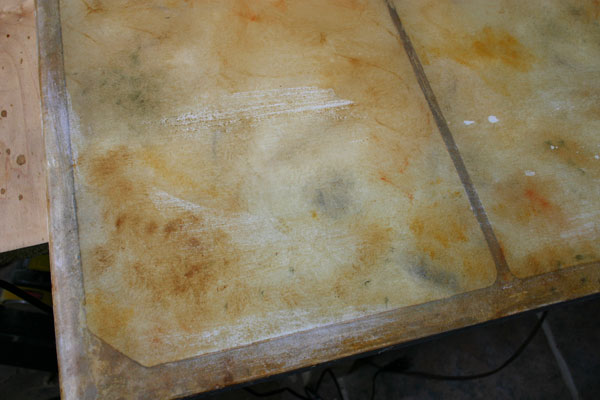
Stretched
a piece of the light weight Polyfiber fabric that came with
the kit on the second test frame.
Tightened
it at 250 degrees with the little Black Baron iron, setting
the temperature with the little Coverite coil thermometer. |
| Made
the rest of the fittings for the flying and landing wires,
including 2 plates to bolt to the front of the cabanes that
will keep the landing wires from rubbing on the bottom of
the top wing root rib. |
|
|
5
hrs |
|
|
| 19 |
|
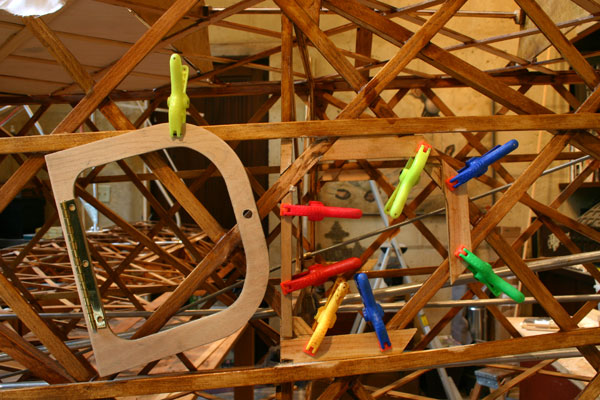
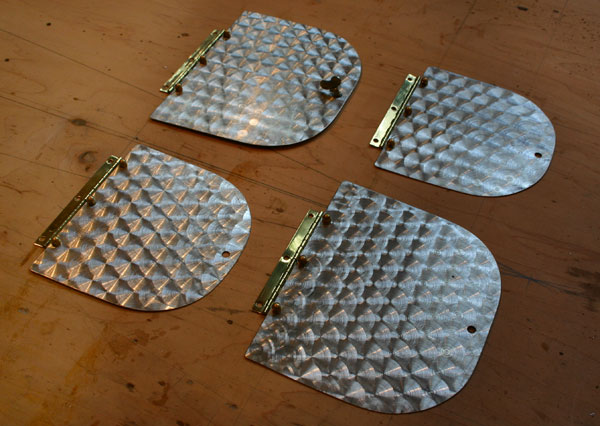
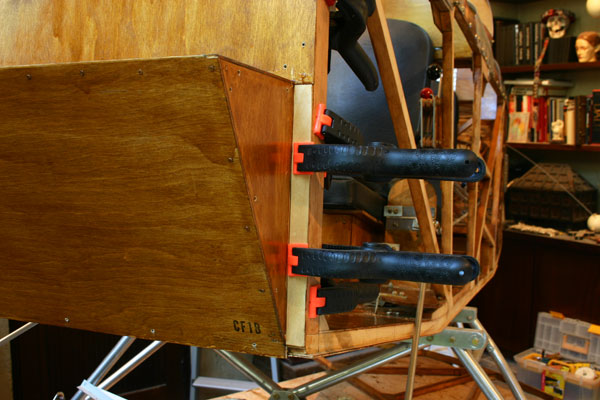
Cut
out four D shaped 1/8" plywood mounting plates for inspection
doors on sides of fuselage at the two rear bulkhead locations.
Used shims to level geodetic to an even gluing surface.
Built up hinge attachment member.
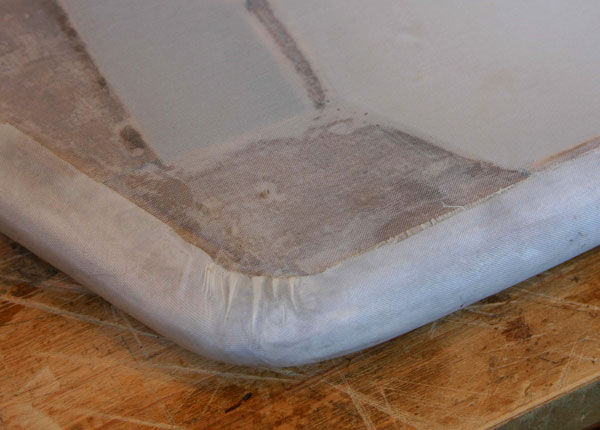
Bought
4" brass hinges and small acorn nuts and screws. Ironed
fabric on frame at 350 degrees. |
Cut four
aluminum inspection doors out of .032 thick aluminum.
Shaped
four pieces of wood to streamline the flat aluminum tail
struts. Attached them with brass screws and acorn nuts. |
|
|
5
hrs |
|
|
| 220 |
|
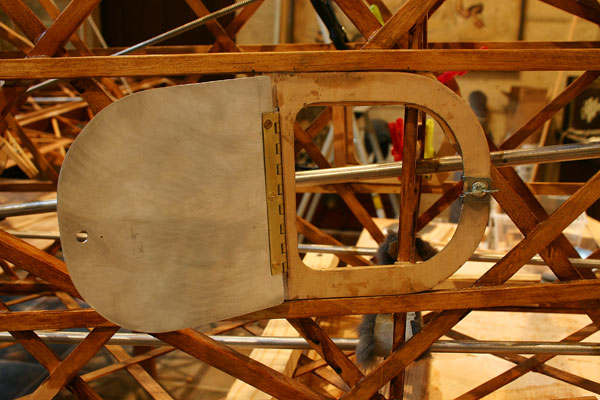
Glued
plywood plates in place, after cutting a slit to mount
hinge through. Drilled and mounted hinges on doors with
small flat head brass screws and acorn nuts.
|
Sanded
circle pattern on one of the doors.
Drilled
plates and doors for wing studs and Southco clip fasteners.
These fit on the 1/8" plywood plates fine. |
Antiqued
one side of the stretched frame with artist oil paints and
liquin.
Received
the gas gauge today. The tank will have to be drilled and
a mounting plate welded on top to fit the sensor. |
|
|
6
hrs |
|
|
| 221 |
|
Lightly
sanded with 220 sandpaper and sprayed
a light coat of varnish on the LL and UL wings, and the
other side of the rudder and ailerons.
|
| Did
the circle pattern on the inspection doors. Drilled doors
and plates for wing fasteners. Mounted brass hinges with
3-32x 1/4"flat head brass screws and brass acorn nuts. |
|
|
6
hrs |
|
|
| 222 |
|
Lightly
sanded with 220 sandpaper and brushed a thinned coat of
epoxy varnish on one side of rudder, elevator, trim tab,
and 2 ailerons .
Varnished
steamlining pieces for stabilizor struts. |
Lightly
sanded with 220 sandpaper and spayed a coat of varnish on other
side of LL and UL wings.
Varnished
other side of rudder, elevator and ailerons with epoxy. Also
varnished the fuselage stringers to use up what was mixed. |
|
|
6
hrs |
|
|
| 223 |
|
Modified
LR aileron push rod with smaller tubing.
Made
a 1/8" plywood plates for both lower wings, with elongated
hole to get push rods through, and cover with leather(slit)
and an aluminum or copper plate .
Sanded
both LL and LR wings lightly one more time. |
Took
down the right wings. Made 1/8" plywood plates for strut
attach points on bottom of upper wing.
Added
gussets to wing tips.
Spackled
trailing edges. |
|
|
6
hrs |
|
|
| 224 |
|
Lazy
Sunday... Practiced
with the fabric covering the trim tab. Realised the tape I
bought was medium weight. The Poly-Fiber light certified
tape is quite expensive, so I am thinking of buying the
2" tape I need most of to tape ribs and longerons, and
cutting the 4" straight and bias tape out of the extra
fabric, since I am not covering the plywood sides and bottom.
|
Tried
to give a coat of Poly-Brush on top of my oil paint antiquing,
but found it lifted and left white brush marks. I could
try to spray the last 2 coats of Poly-Brush, since the
brush marks show too. Or I could do the antiquing after
the 3 coats of Poly-Brush.
|
|
|
3
hrs |
|
|
| 225 |
|
Sanded
and spackled some more on top wings and ailerons.
Lightly
sanded stabilizer.
Glued
missing 1" ply strips at root of one upper wing. |
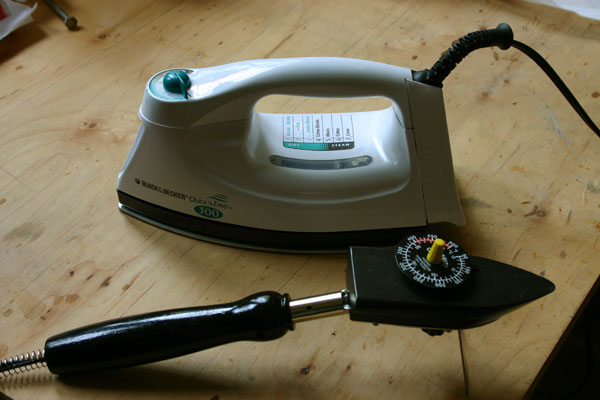
Found
a basic Black & Decker Quick'n Easy iron Model 300 at Ace
hardware, and calibrated it with the little coil thermometer.
You have to always set the temperature by turning the knob
clockwise from the off position, and not back up counter
clockwise, as there seems to be some play in it.
Bought
pinking shears. |
|
|
3
hrs |
|
|
| 226 |
|
More
sanding, spackling and varnishing . The varnish is getting
to me again, even though I bought a new respirator. I suppose
the problem is that with my beard, I cannot get a good
fit.
Tried
to cover and aileron, but the epoxy varnish lifted. I had
not realized it was supposed to cure for 7 days... Bummer.
I might just forget about it and just use the Polyurethane
varnish, which does not seem to lift. That is what Fisher
does, and what Dave did. |
|
|
4
hrs |
|
|
| 227 |
|
I
am really under the weather today with that varnish allergy.
Just a little more varnishing |
|
|
2
hrs |
|
|
| 228 |
|
Still under
the weather. More varnishing |
|
|
4
hrs |
|
|
| 229 |
|
More
varnishing.
Decided
to use 3/4" square 4130 chrome alloy tubing for motor mount,
with 1/2" round braces. Called Gene about it and he said
it would be fine, and recommended wall thicknesses of .049
for the square and .058 for the round. Also decided to
use a horizontal piece of 3/4" square tubing welded across
the top of he engine mount , with 2 bolts going through
the top horizontal member, which I will re-enforce at the
attach points with 3/8" ply blocks.
I
re-enforced the two vertical members behind the firewall
with a 1/8" and a 3/8" plywood strips glued to the inside.
Also added a 1/8" ply strip on each side of the boot to
have a level surface to bolt the engine mount. |
|
|
4
hrs |
|
|
| 229 |
|
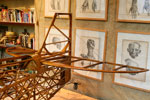
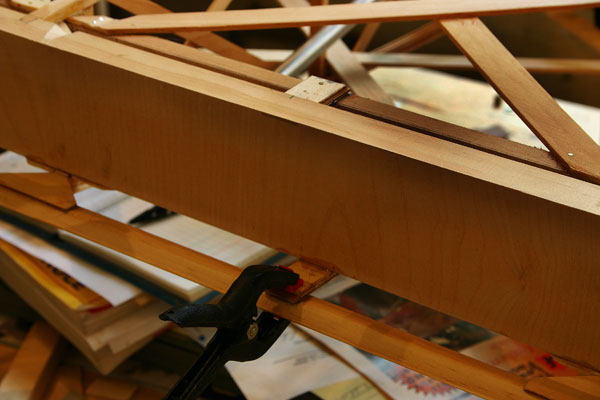
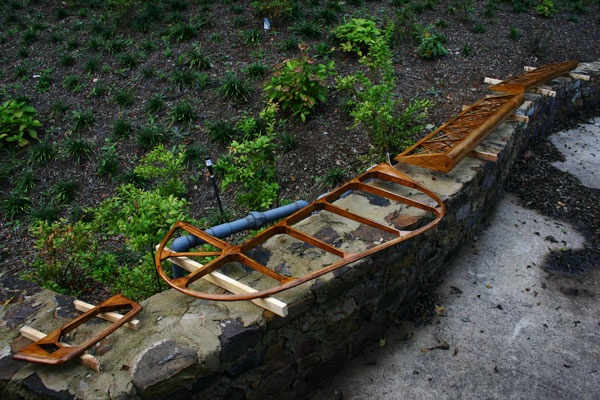
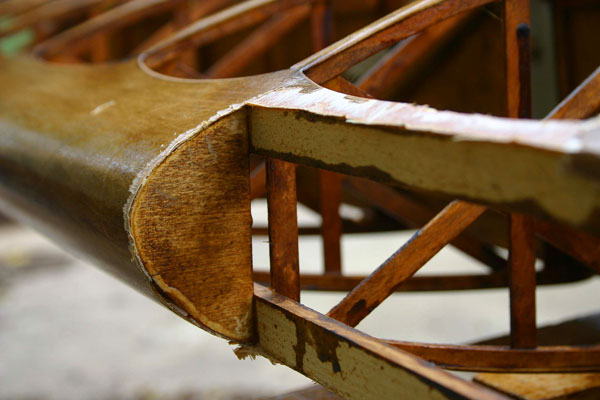
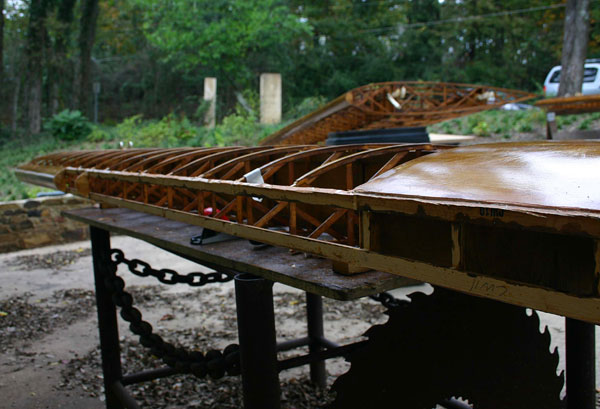
I
cannot believe I did not notice before that the leading
edge was upside down on the wing that was already built
when I got the kit...You can see in the picture it kind
of curls up! |
| I
have no choice but to tear it down and redo it. |
Finished
re-enforcing front vertical members with a 3/8"plywood plate.
Re-enforced
top horizontal member at each end the same way. |
Glued
firewall bow onto top part of firewall to provide attachment
for the cowling and turtle deck.
Talked
to Steve at Florida Flyers today. He will ship the engine
on Monday. |
|
|
4
hrs |
|
|
| TOTAL 733hrs |
|
|