|
| C
O N S T R U C T I O N L O G |
|
| S
E P T E M B E R 2
0 0 4 |
|
 |
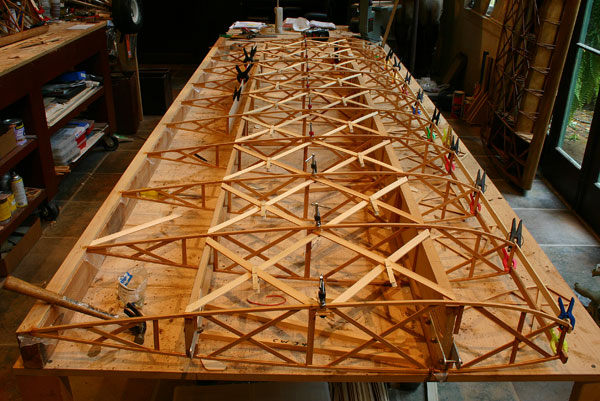
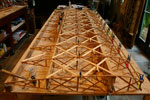
| One
wing to go! |
|
| 1 |
|
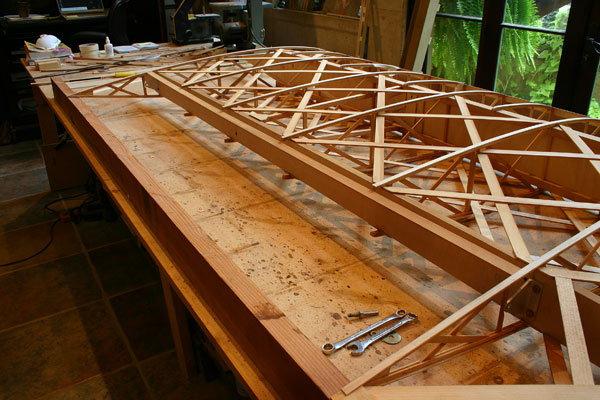
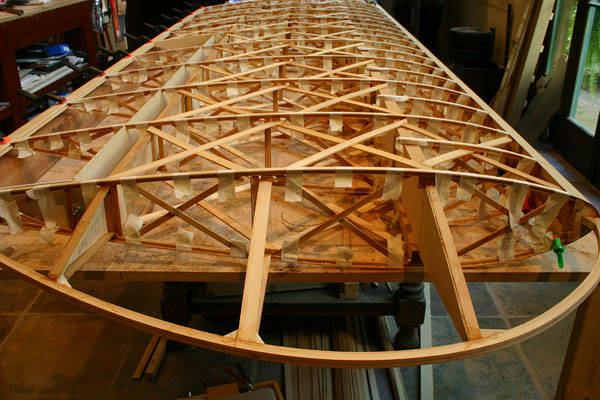
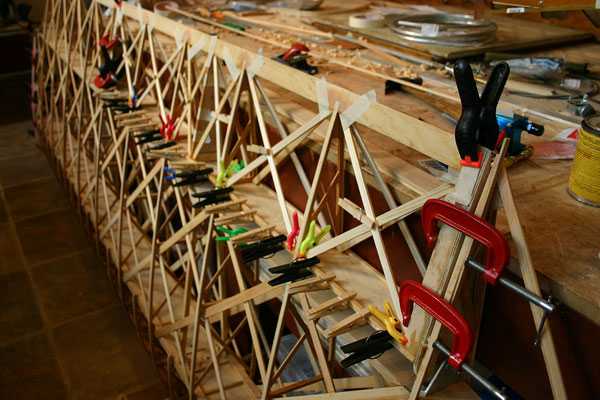
Cut
out the rest of the scallops, planed and sanded ribs smooth.
Cut
out aileron. Riversed hinge. |
Rounded
aileron nose ribs , notched 1/32" for skin. Dry fitted skin
and marked glue lines.
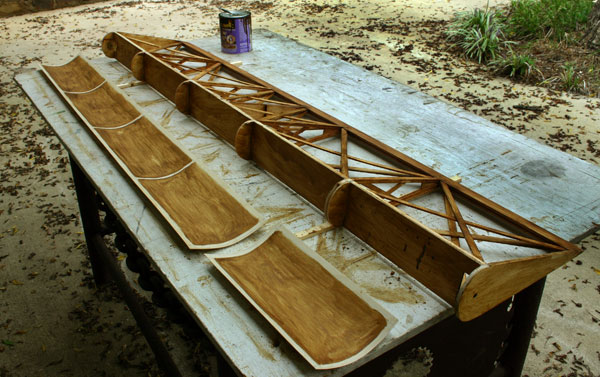
Set
up table outside and varnished aileron and skin except for
glue lines. The varnish is definitely what I have been terribly
allergic to lately. I can feel it even in open air. But I can't
seem to find a match for match the color in another brand. |
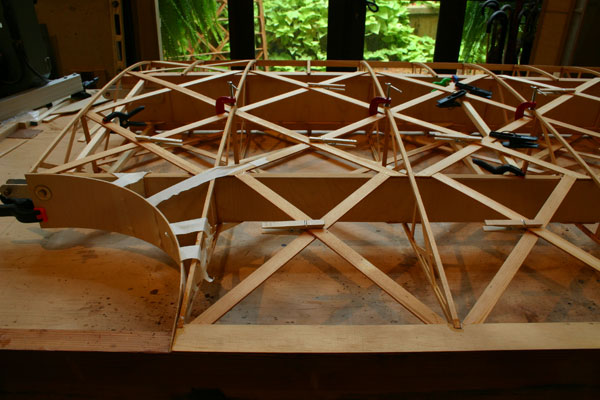
| Cut
out a piece of 1/8" plywood for curved cut out in upper wing.
Marked using ruler across ribs, cut precisely, and glued in.
Added four 1/16" braces to keep it stiff. |
|
|
7
hrs |
|
|
| 2 |
|
Tried
unsuccessfully to find a matching varnish stain in another
brand that I might not be allergic to. Ended up mixing 1/2
Minwax Polyshades Antique Walnut and 1/2 Classic Oak , and
added some Minwax Golden Oak stain for yellow.
Second
coated inside of leading edge.
Glue
on leading edge skin. |
Beveled
and notched, and glued in the 2 strips that form the trailing
edge of the aileron bay.
Spackled
leading edge of wing with Aero-Poxy. |
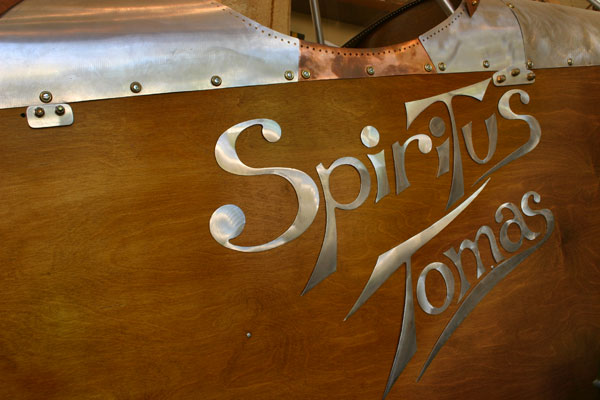
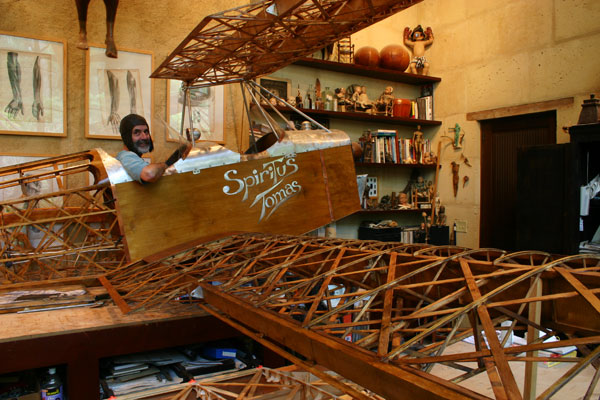
| Finished
cutting out the letters for Tomas. Trying to decide whether
to put the h or not. |
|
|
6
hrs |
|
|
| 3 |
|
Sanded
aileron and wing leading edge. Spacked other side.
Gusseted
wood strips on the underside.
|
Gave
a second coat of varnish to aileron.
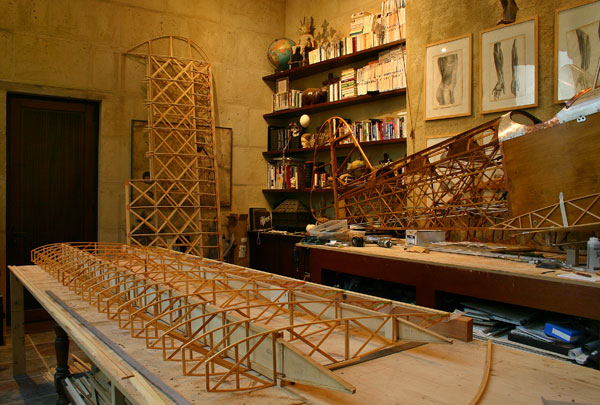
Laid
out third wing, the upper left one. Glued ribs in notches
of trailing edge. Prepared 1/8", 1/16" and 1/32" spacers
to fit in space between top of main spar and rib caps. |
| Got
an e-mail with pictures from Jamil Diaz, who is pionneering
putting a VERNER 1300 on a Classic in Porto-Rico . His installation
looks good. The engine bed type mount looks simple enough
to make. Now if he would hurry up and fly the darn thing, I
might finally make up my mind as to what engine I want! He
says he has seen one on a Kitfox
though, and it ran and sounded great. |
|
|
4 hrs |
|
|
| 4 |
|
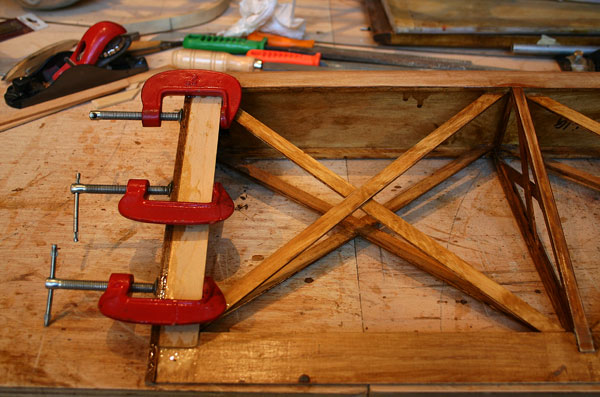
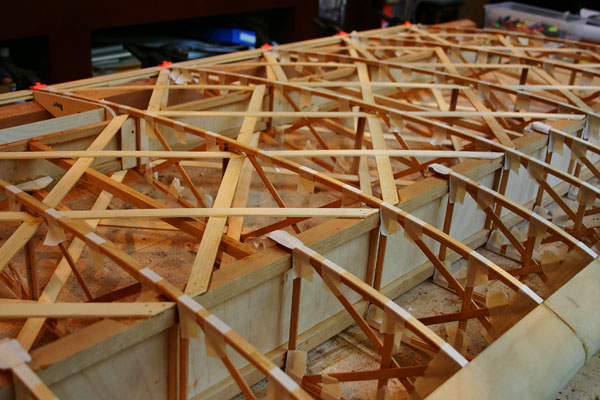
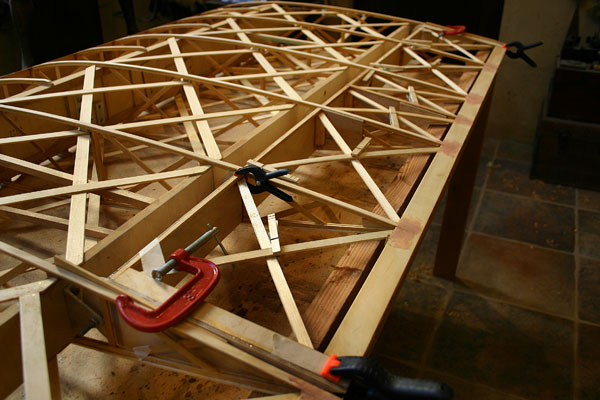
Glued
ribs to main spar using plywood shims to fill gap.
Glued
2 strips in front of ribs.
Glued
ribs to rear spar, using little wedges to fill gaps.
Cut
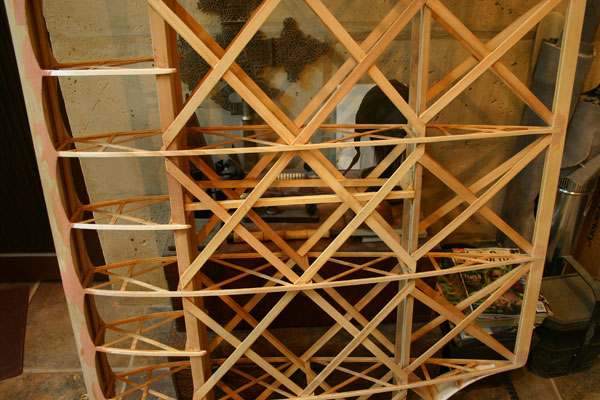
and glued geodetic on top side of wing. |
|
|
6
hrs |
|
|
| 6 |
|
Varnished
second wing both sides with new varnish, outside.
|
Glued
in false ribs. Glued in nose ribs. Doubled them where the 48"
pieces of skin meet.Glued
compression members on top of wing.
Drilled
2 holes in rear spar and glued in bushings after cutting
out last cell in trailing edge. Attached brackets to spars. |
|
|
6
hrs |
|
|
| 7 |
|
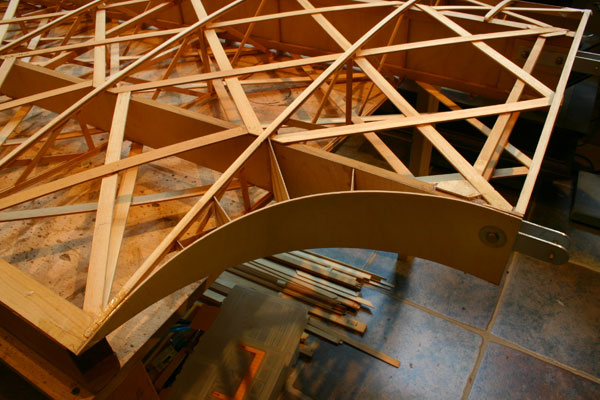
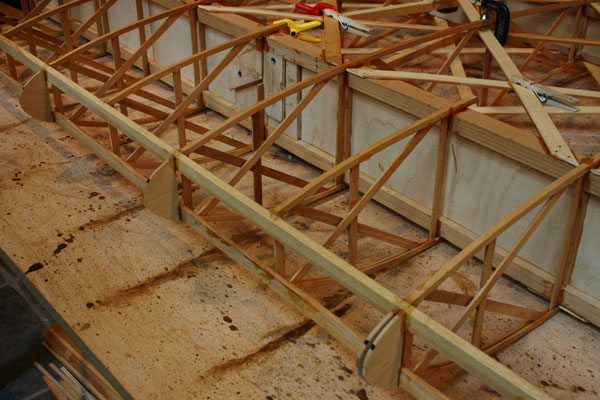
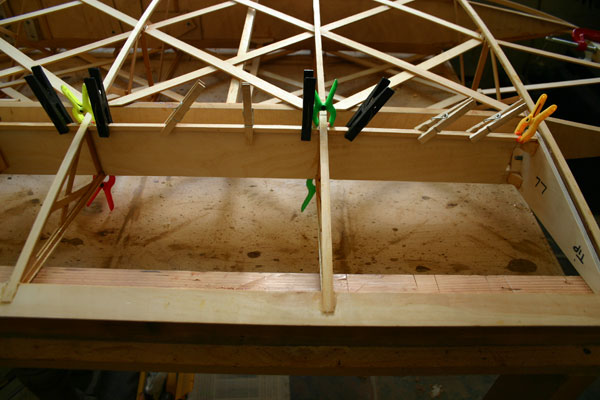
Glued
in curved notch ply. Put in re-enforcing 1/16" ribs.
Glued
in bottom geodetic and shims. |
Cut
notches in and glued in aileron spar.
Cut
1/2"x1/2"notch in tip nose rib, trimmed ends of bow supports
at proper angle, dry fitted bow. Glued in tip bow. Added
blocks and gussets at all joints. |
|
|
8
hrs |
|
|
| 8 |
|
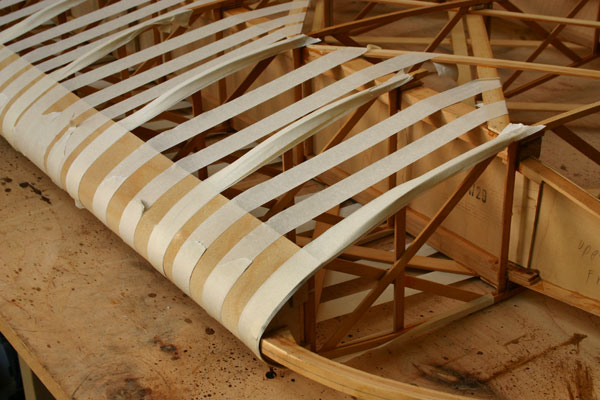
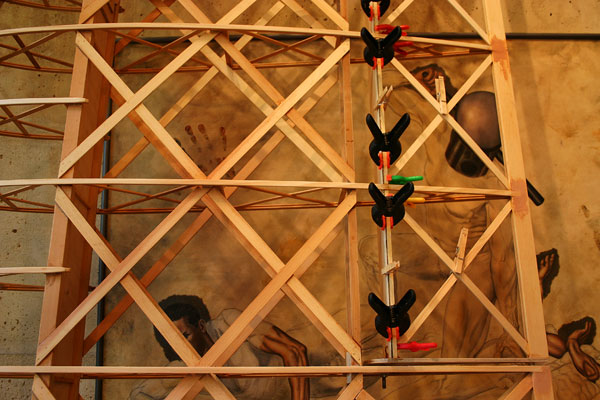
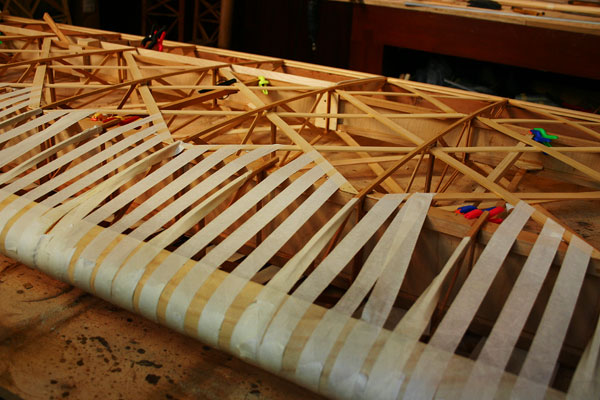
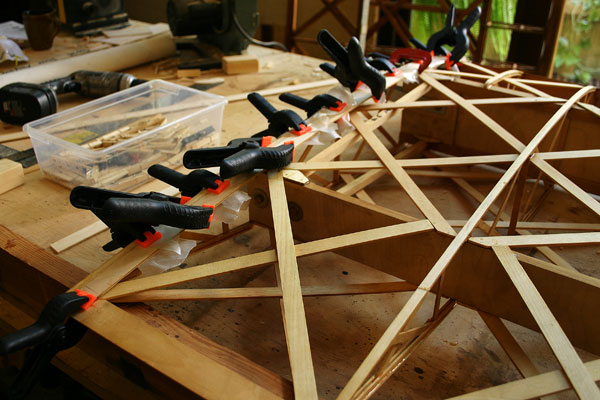
Dry
fitted leading edge skin and marked glue lines. Held skin
in place with 1" masking tape. Untaped one side , put glue
on both surfaces, and retaped tight.
|
Finished
trailing edge geodetic on top side.
Cut
2 ends aileron ribs, drilled them for hinge pin in place.
Glued them to spar and trailing edge. Varnished
second aileron.
Cut
a bunch of 1/16"x3/8" strips out of unused stringers,
and a bunch of 1/8"x1/2" strips for aileron geodetic. |
|
|
8
hrs |
|
|
| 9 |
|
Untaped
leading edge, cleaned glue residue.
Glued
1/16"x 3/8" cap aps on top side of wing, then on bottom. |
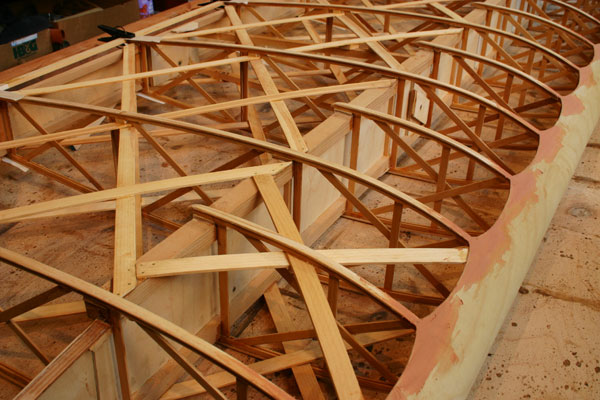
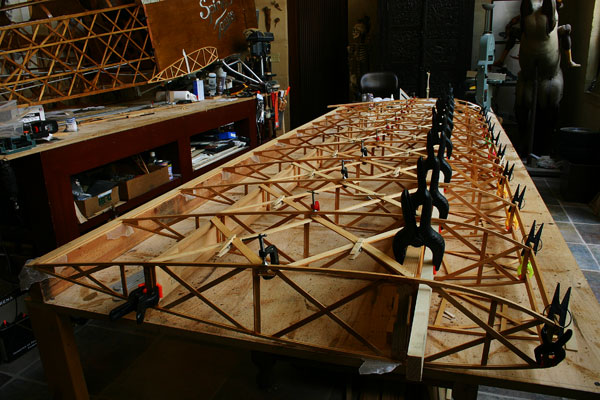
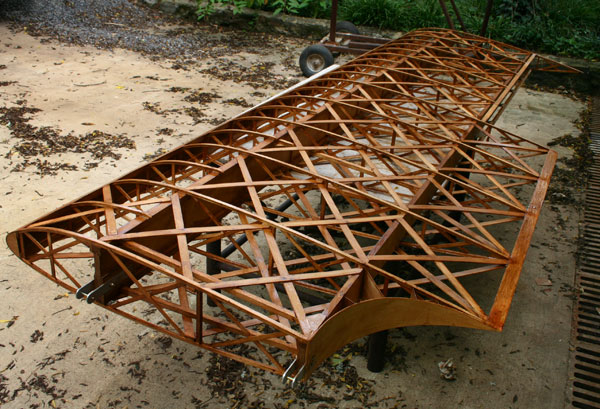
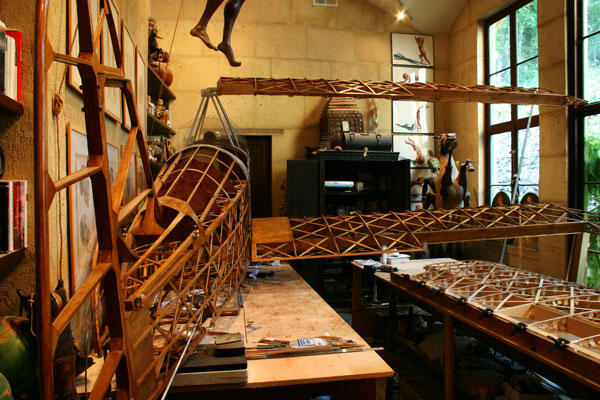
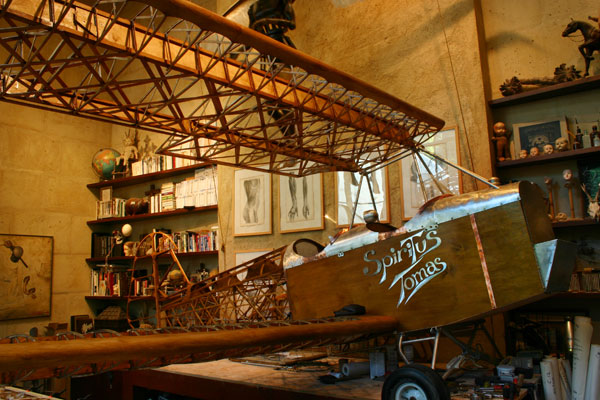
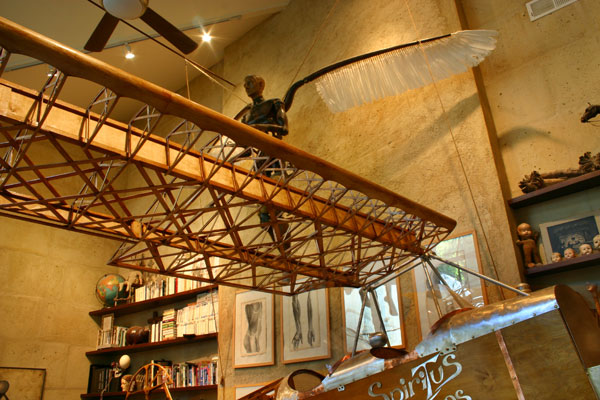
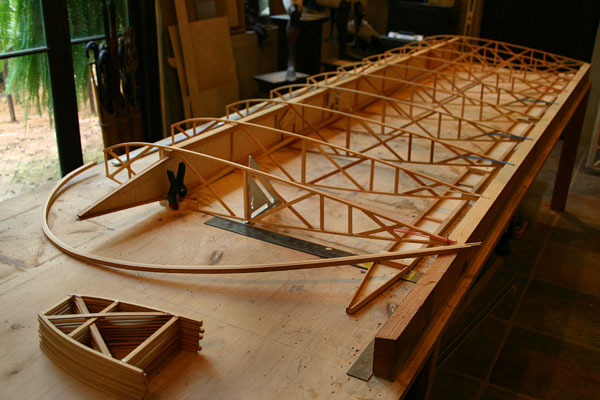
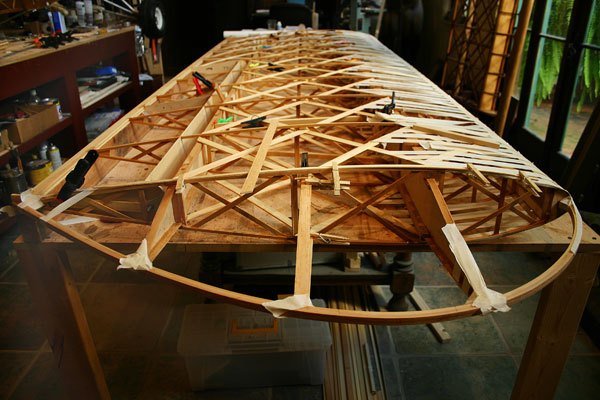
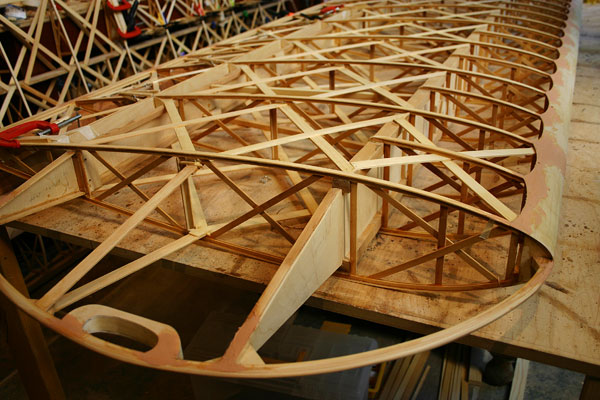
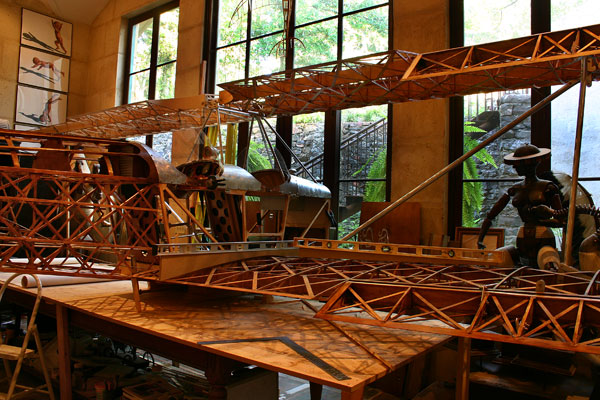
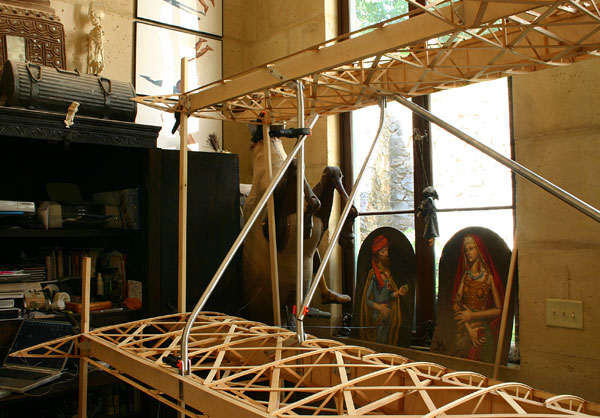
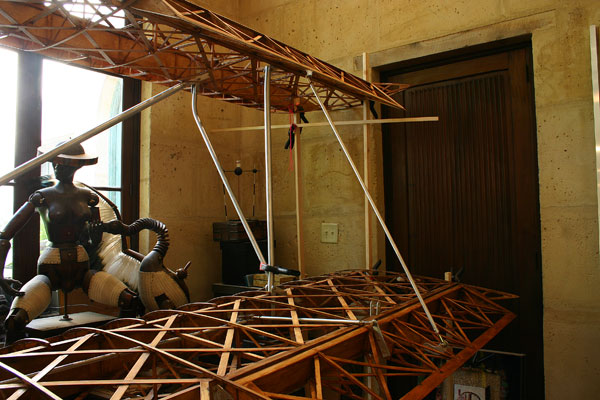
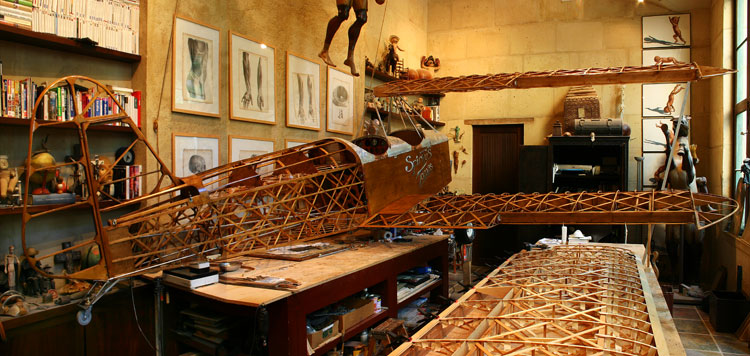
Put
2 wings on temporarily to see how it looks and take some
pictures. Whow, that really looks like an airplane! And feel
like an airplane when you sit in it! Well, still 1/2 an airplane
actually... but not for too long.
|
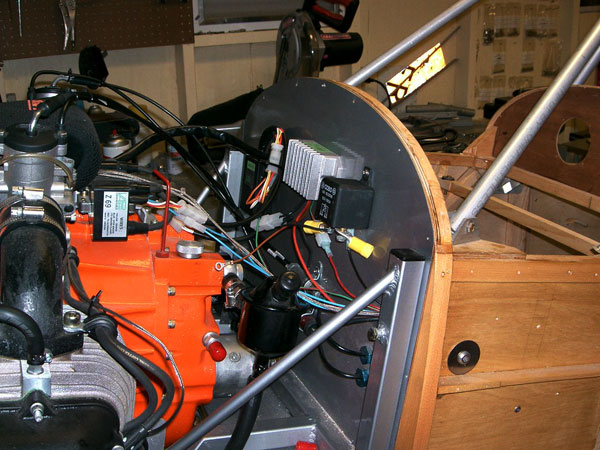
I
need to order an engine , and it looks like it might be the
VERNER 133 after all. I called Florida Flyers, and they are
sending me the forms.
Jamil
Diaz sent me a picture of the motor mount he designed for the
Verner. Simple enough, and strong. I assume he used the Verner
rubber mounts. |
|
|
8
hrs |
|
|
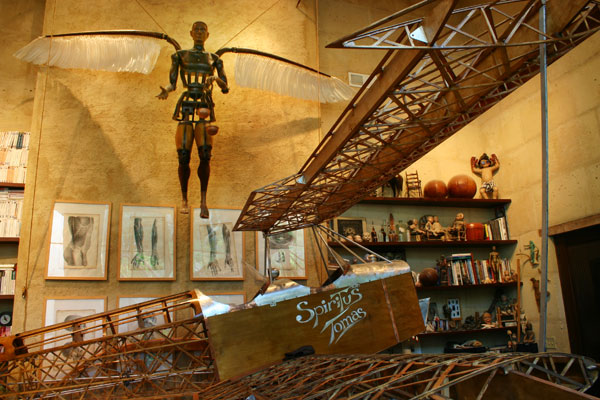
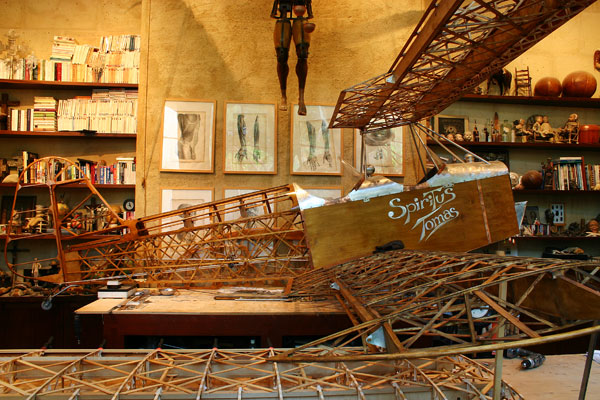
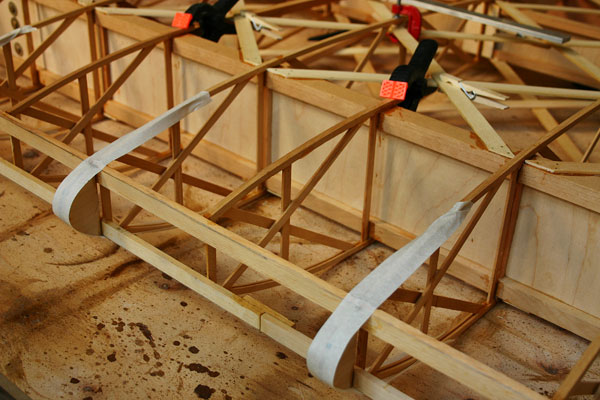
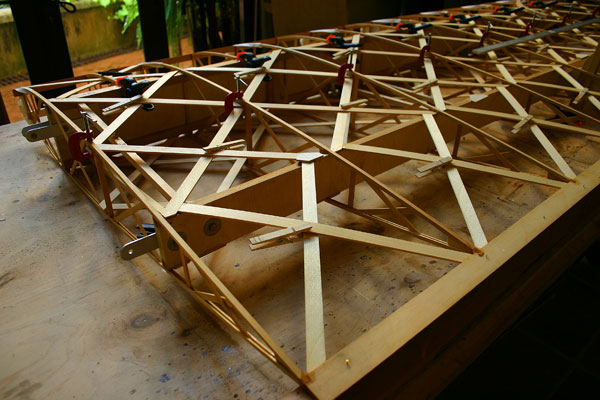
| Here
are a few more pictures, from every angle. |
| |
|
| 10 |
|
Removed
tape.
Cut
scallops in plywood leading edge ply.
|
|
2
hrs |
|
|
| 13 |
 |
Spackeled
leading edge and trailing edge on both sides.
Cut
bottom side aileron geodetic . |
|
2
hrs |
|
|
| 14 |
|
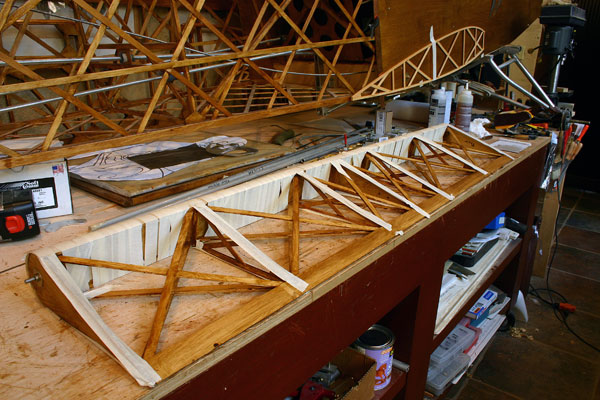
| Glued
in geodetic on bottom of aileron , and 1/4 " spar strips
. |
Laid
out fourth wing, the bottom left one. Glued ribs to trailing
edge and left to dry.
Trimmed
false ribs . |
| Glued
two 1" ply strips on sides of aileron. |
|
|
3
hrs |
|
|
| 15 |
 |
Glued
ribs to main spar(plenty of epoxy on bottom ,shims on top). Slid
in rear spars and glued it in with little wedges of wood on bottom
and top. Glued in aileron spar.
Glued
the two 1/4" strips at front of ribs.
Cut
and glued geodetic on top side of wing. |
|
5
hrs |
|
|
| Well,
this is it, I just ordered the VERNER 133, with oil cooler, exhaust and
gauges, and sent half the money to Florida Flyers. The other 1/2 is due
when it ships from the Tcheck Republic to Florida. They will check it
there , then ship it on to me. I will hopefully have it quickly. |
|
| 16 |
|
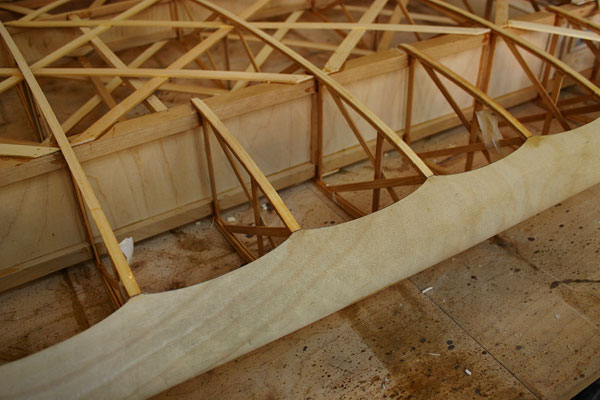
| Glued
in false ribs, compression members, and nose ribs. |
Turned
wing over . Cut and glued bottom compression members.
Cut
and glued geodetic on bottom side of wing. |
Cut
aileron end ribs out of 1/4" plywood, installed hinges and
drilled holes for pins.
Cut
out 1/2" trailing edge sections , and glued end ribs in place
to spar and trailing edge. |
|
|
6
hrs |
|
|
| 17 |
|
Dry
fit nose skin, marked glue lines, glued in place and taped
tight .
Glued
bottom compression members. |
Fit
and glued tip bow , as well as re-enforcing braces and gussets.
|
Fit
and glued extra aileron ply ribs to attach controls, and
corner blocking.
|
| Fashioned
2 handles to put on wing tips. Used a wedge of wood sandwiched
between 2 pieces of 1/8" ply, with an oval cut out. It will
be glued to the inside of the bow. |
|
|
8
hrs |
|
|
| 19 |
|
Removed
tape, cleaned up glue residue.
Cut
and glued 3/8"x1/16" cap strips to ribs on both sides. |
|
|
8
hrs |
|
|
| 20 |
|
Removed
tape, cleaned residue.
Glued
aileron 1/4"x1/4" spar caps on bottom side, and aileron nose
ribs.
Glued
aileron nose ribs on third wing too. |
Glued
1/8"x1"plywood strip at root end on bottom side.
Same
for 3rd wing. |
Cut
scallops in leading edge ply.
Rounded
ends of false ribs. |
| Finished
shaping wing tip handles blocks and glued them to the bow of
both bottom wings. |
|
|
6
hrs |
|
|
| 21 |
|
Sanded
leading edge of third wing.
Glued
1/4"x1/4" aileron spar caps on other side, as well as geodetic
and 1/8"x1" plywood side strips. |
Cut
and glued geodetic and 1" ply strips on bottom of fourth
wing aileron.
|
Sanded
bottom side of fourth wing.
Spackled
leading edge and trailing edge with Aero-Poxy. |
|
|
8
hrs |
|
|
| 22 |
|
Sanded
other side of lower left wing. Cut and glued geodetic on top of aileron,
and aileron spar caps.
Fit
and glued 1' ply strips at each end of aileron, and at root of
wing.
Studied
my manual and got a flying lesson from Bob this afternoon. We stayed
in the pattern doing take offs and landings. It's hard to keep
that tail dragger straight... |
|
4
hrs |
|
|
| 23 |
|
Finished
sanding lower left wing, spackled leading and trailing edge.
Cut
out aileron.
Fitted
1/4" beveled strips on rear end of cut spars with 1/4'x1/4' notches.
Cut
aileron out of upper left wing, and glued the 1/4" strips too.
Practiced
take-offs on the simulator, and got another flying lesson in Sylacauga. |
|
4
hrs |
|
|
| 24 |
|
Cut
1/16" ply gussets , and glued under 1/4" strips.
Sanded
spackled areas.
Cleaned
up.
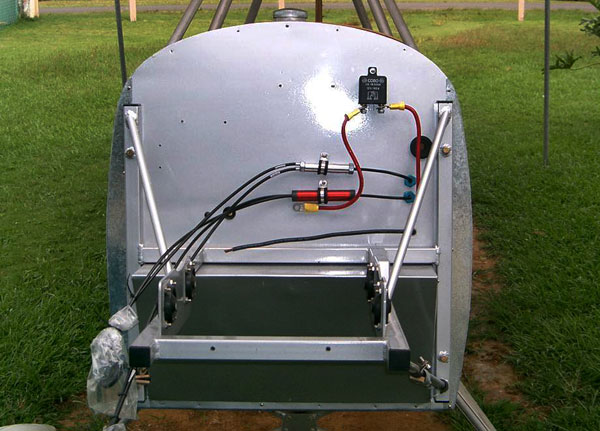
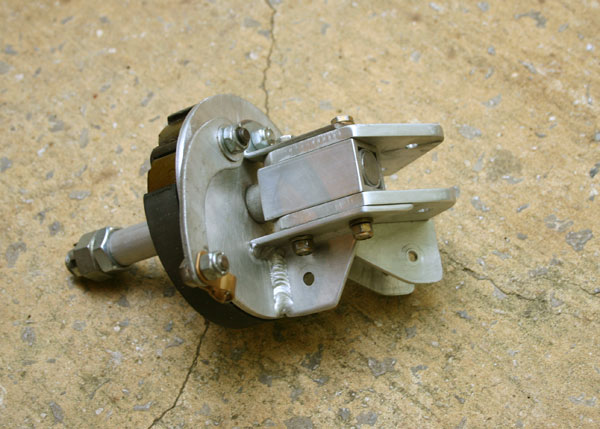
Went
to see Buddy Tollison to look at his fuel system, electrical system,
instruments panel, etc... His axles are attached to the gear with
a totally different aluminum bolted unit, much nicer then my welded
steel angle contraption. The brake itself is also much better,
and bigger. I will have to see about it after I find my wire spoke
wheels.
|
|
3
hrs |
|
|
| 25 |
|
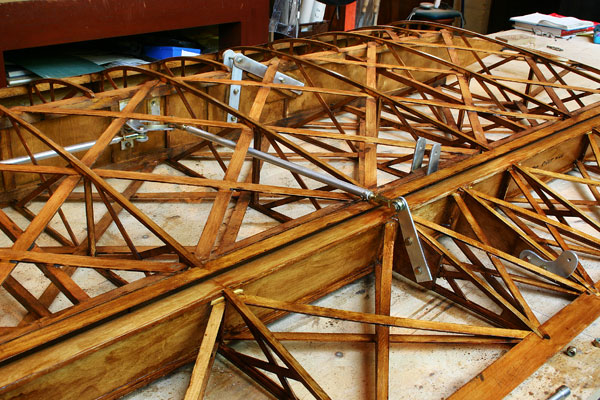
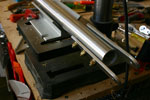
Got
a brushed finish on all the aluminum parts and tubes.
Started
attaching fittings to wings.
Installed
aileron push rods with rod end bearings instead of clevis forks.
Had to notch the wing walk supports fot the push rod to fit. |
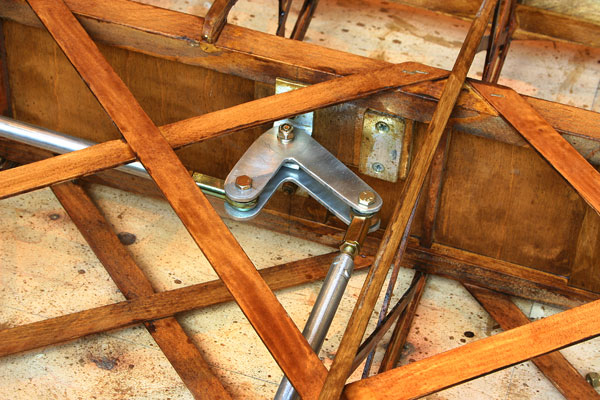
| I
doubled the bell crank so the bearings would be supported
on both sides, even though Gene said mounting them to the
side was fine. I found it tended to bind and not move very
smoothly. Will have to get 2 more from Fisher. |
|
|
8
hrs |
|
|
| 26 |
 |
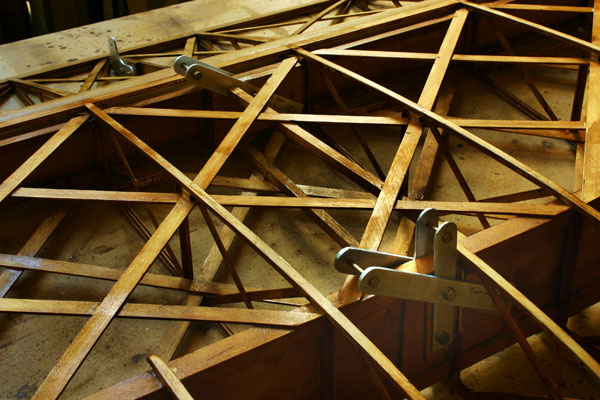
Attached
the rest of the fittings to the wings. Drilled lined up 1/4" holes
in all of them, one side at a time , from the 3/16" predrilled
holes.
I
am now ready to turn the fuselage sideways across the room on top
of the table, attach the wings, and rig the struts and wires. |
|
3
hrs |
|
|
| 27 |
 |
Turned
fuselage across the room and clamped it down on blocks on top of
the tables, level side to side and front to back.
Cut
2 degree wedge and fixture to sit on wing out of 5/8" paticle board.
Attached
top wings to cabanes. At this point, rear spar fittings are not
drilled 1/4" yet. Supported wing tips with sticks and
leveled wings. Pulled
string along leading edges to line them up. Put nail centered on
top of tail post and used it to check the distance to both wing
tips is equal. Pulled wires to hold it. |
|
6
hrs |
|
|
| 28 |
 |
Set
4 level blocks on floor below main spar. Level top wings ,same
distance from floor.
Check
equidistance between tail post and wing tips.
Drilled
doubled strut tubes for fittings on gear ends and bolted them on.
Cut tubes to length, and added 2 doublers riveted at tip end .
Having
a hard time getting everything absolutely equidistant and level. |
|
6
hrs |
|
|
| 29 |
 |
Chuck
at Fisher suggested that getting things within a 1/4" was fine,
and that a lot of planes were probably not that close.... Finally
got everything within 1/4" tolerances, most of it within 1/8" actually,
drilled main struts and bolted them on.
Then
fit lower right wing on. Had to add a 1/16" shim to increase the
spacing of the fittings for them to fit the thicker rear spar
carry thru.
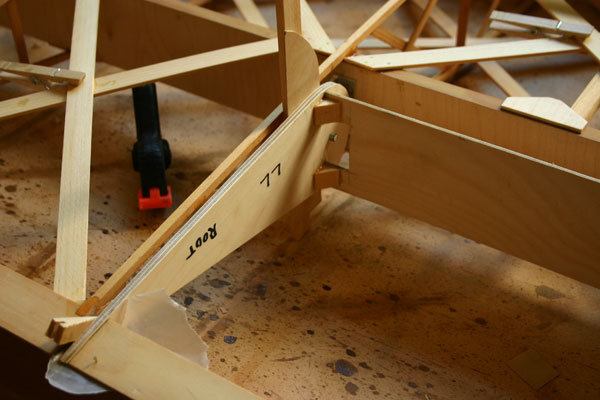
The
rib shaped jig cut from the blue prints turned out not to fit the
actual wing at all, so I ended up drawing the actual airfoil and
tracing the camber line to determine the correct chord
line and correct the jig.
Supported wing
at root end with wooden blocks so bottom is level with bottom of
fuselage. Set the angle of incidence to zer0 with corrected jig,
and dihedral to 2 degrees using the wedge jig and levels. The distance
between the bolts of the inter wing strut is about 36 1/3" instead
of the 35 1/2" of the blue print . |
|
6
hrs |
|
|
| 30 |
|
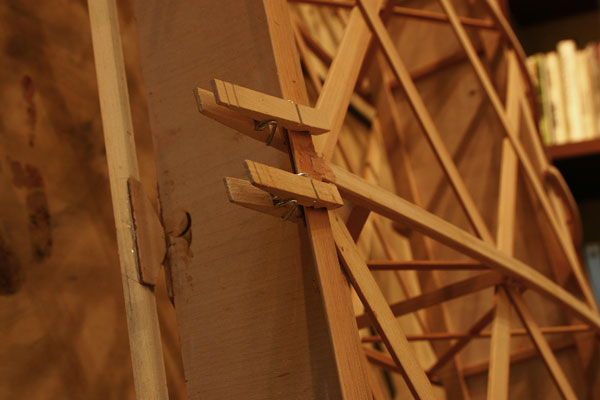
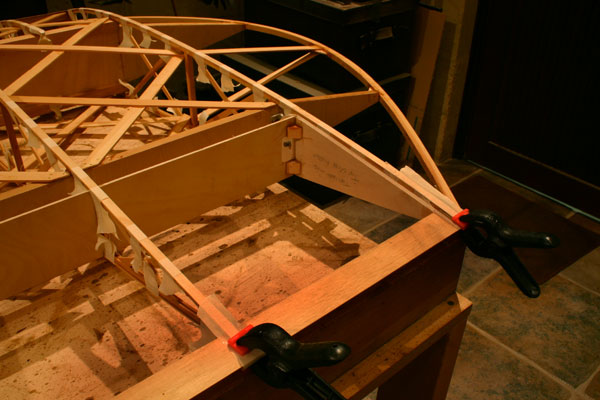
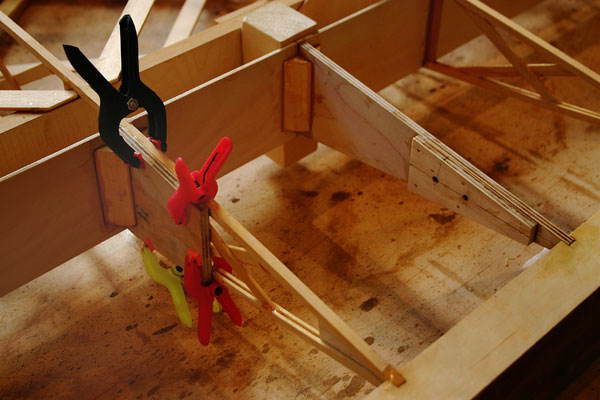
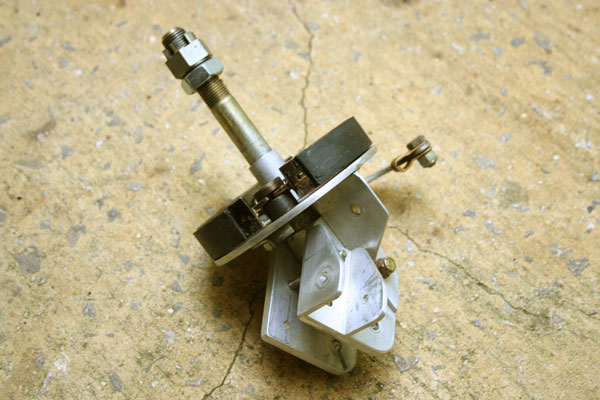
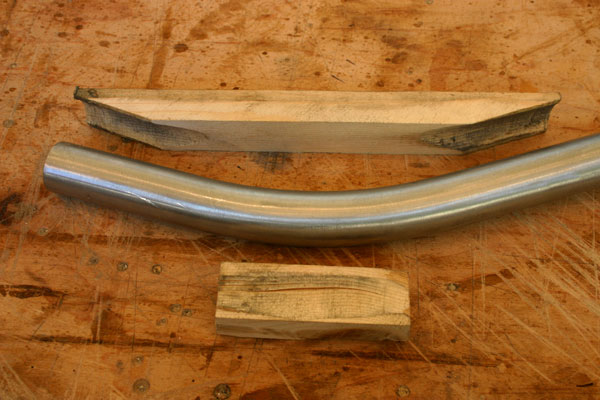
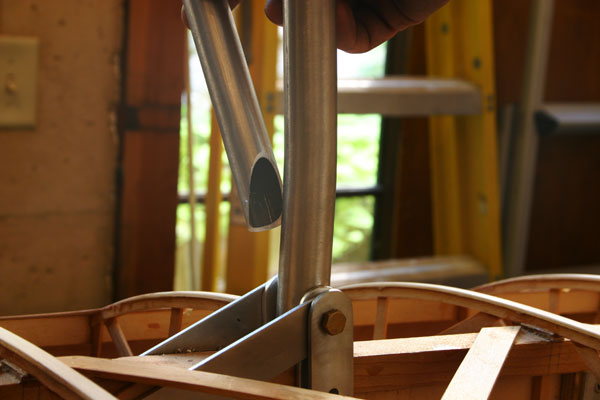
| Dry
fitted front and back leg of N struts. The bent in the back
leg is too much, as the picture shows. |
| So
I shaped 2 wood blocks to protect the tubing and flatenned
the bent in the vise until it fit. |
| Beveled
the other end of the tubing and ground and filed them to fit. |
| Made
the two rods connecting lower to upper ailerons. Because the
rods are so slanted, the 2 ailerons do not move proportionally.
The upper aileron travels much further down than the lower
aileron. I will ask Gene about this. |
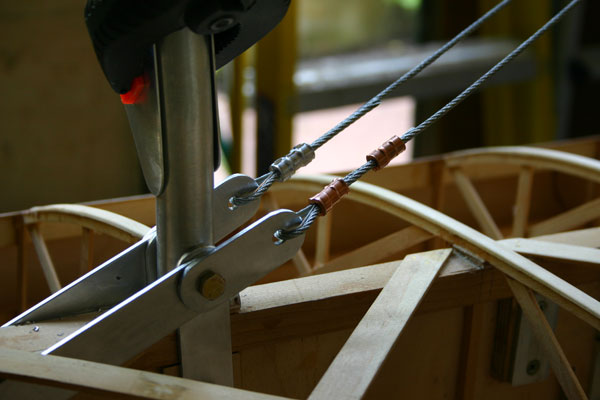
| Cut,
shaped and drilled fittings to attach landing wires to wing.
Slipped cable thimble and cable through hole and put a nicopress
sleeve while holding it tight. Iused the standard aluminum first,
then tried 2 copper ones, which Ilike better. |
|
|
6
hrs |
|
| |
| TOTAL 619
hrs |
|
|