|
| C
O N S T R U C T I O N L O G |
|
| J
ULY 2
0 0 4 |
|
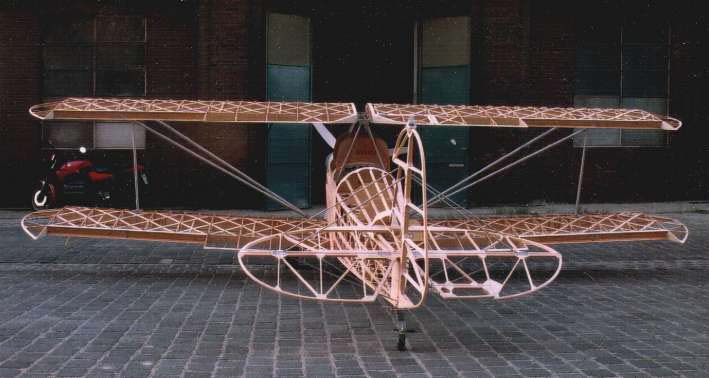 |
| The
Goal (this is Stefan Wode's naked Classic in Germany) |
|
| 1 |
|
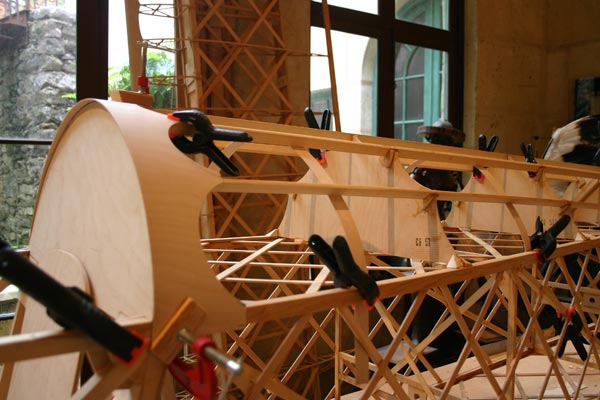
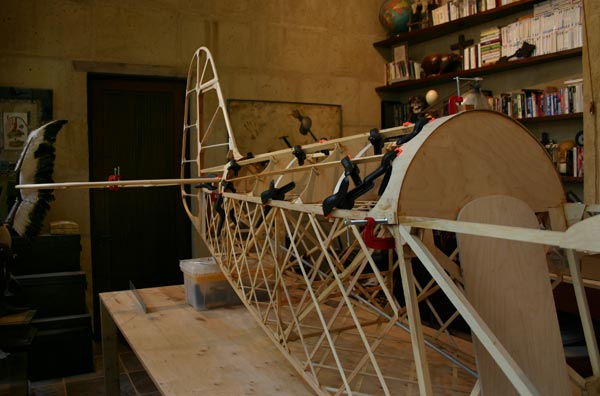
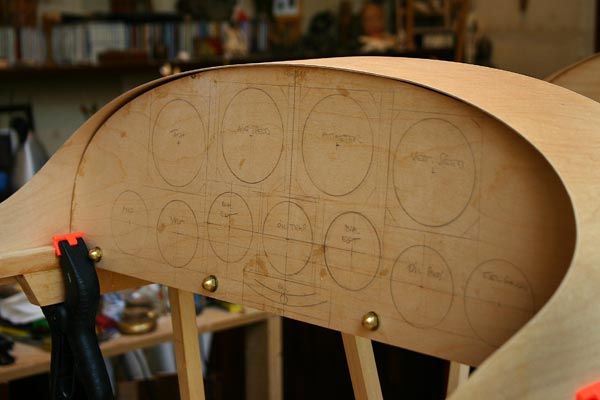
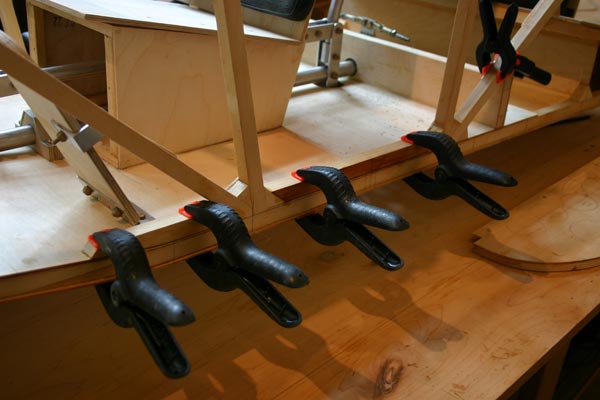
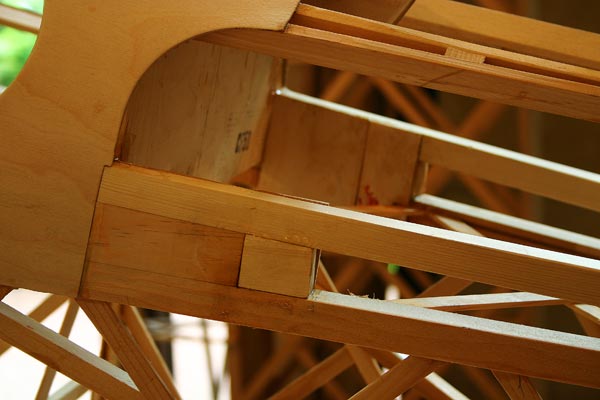
| Finished
gluing stringers and blocks for rear turtledeck . |
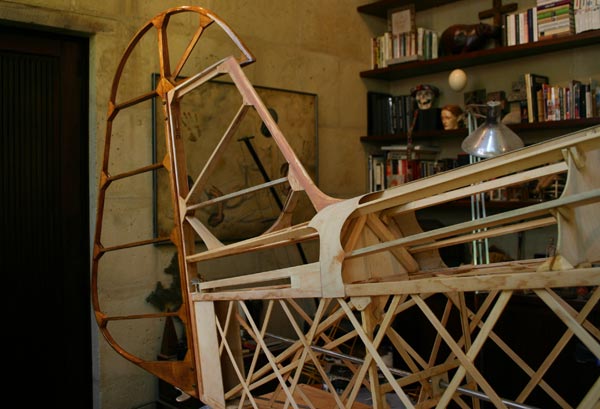
| Cut
and glued 1/2"x1/2" diagonal braces between bulkheads
in fuselage. |
Glued
in place back of main panel and front panel.
Dry
fit wrap around plywood sheets for turtledecks. |
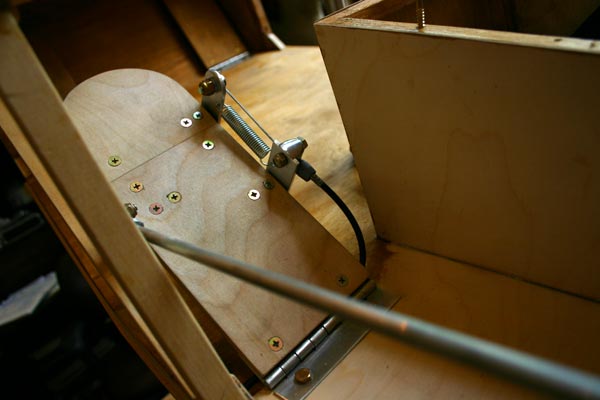
| Mounted
brass hinge on back seat with brass screws. |
|
|
7
hrs |
|
|
Let's
take a look at my engine options. I ran across this great italian engine
link: http://ultraligero.net/Sitios/Motores/motores.htm ,
and checked out all the manufacturers.
I want
to get an air cooled 4 cycle engine , and a radial would look and sound
more authentic on a WW1 style biplane. |
|
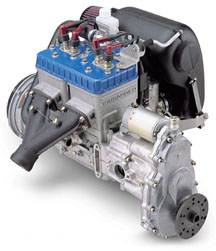 |
The
factory Classic uses the 2 stroke Rotax
582 on the left.
They
seem happy with it, I just don't like 2 strokes much.
If
I were to go with a Rotax, I would prefer the 4 cylinder/4 cycle Rotax
912 , which is the engine on the Klein Classic now. But
it is water cooled, so needs a radiator, water, etc...I would prefer
an air cooled engine. |
 |
|
|
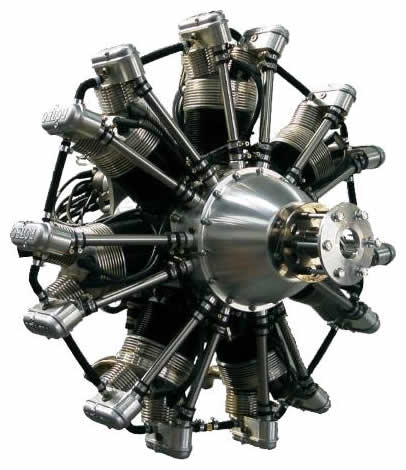 |
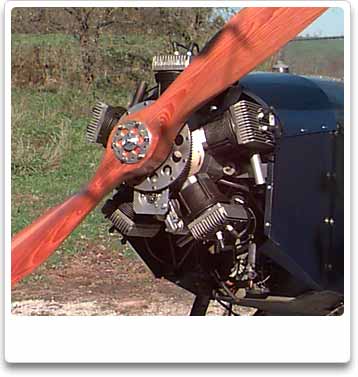
The
best looking and most exciting engine by far is the australian
made ROTEC Radial:
http://www.rotecradialengines.com
What
a beauty. Looks just like the old Gnomes. They offered to sell
one to me for $12500. Unfortunately, Gene says at over 200lbs,
it is too heavy for the Classic. Makes me wish I had built the
Celebrity! Somebody is actually putting one in a Celebrity, check
out : http://www.rotecradialengines.com/customers/phill.htm
Total
swept volume of 2800cc .
110HP
@ 3700 RPM geared.
Total
engine diameter is 810mm (31.9")
Dry
Weight with Accessories (Starter Motor + Alternator + Carb) = 102
Kg
If
there ever is another plane built, this will be the engine on it! matched
taper. Propeller flange specs |
|
|
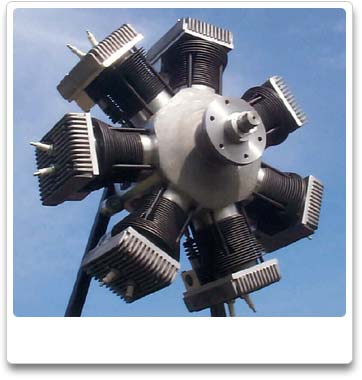 |
There
is another radial actually made in the US by HCI:
http://www.hciaviation.com
It
uses VW cylinders and
pistons, and comes in 5 or 7 cylinders versions:
Horsepower 123
@ 2500 rpm for the 7 cylinders,160lbs
Horsepower 75
@ 2150 rpm for the 5 cylinders, 122lbs |
 |
Gene
seems to think the 5 cylinders R180 would be a possibility, though
he is concerned about drag. The kit is about $10000, the assembled
engine $12000.But that is without carburator, exhaust, etc... |
|
|
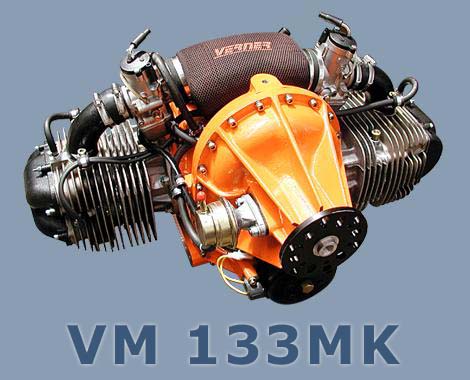 |
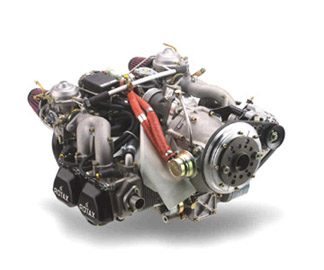
Another
option being tried on 2 Classics at the
moment is the Verner 2 cylinders boxer made in Tchecoslovaquia:
http://vernermotor.com
http://centralfloridaflyers.com
1329
cc / 85.13 cubic inch
Maximum
Power 84HP @ 5500 RPM(3mn max)
Maximum
continuous Power: 70
HP@ 4200 RPM
Torque 88ft/lb
@ 4200 RPM
Reduction
gear box 1:2 or 1:2.29 Weight
61kg including all accessories
|
|
|
| |
|
| 2 |
|
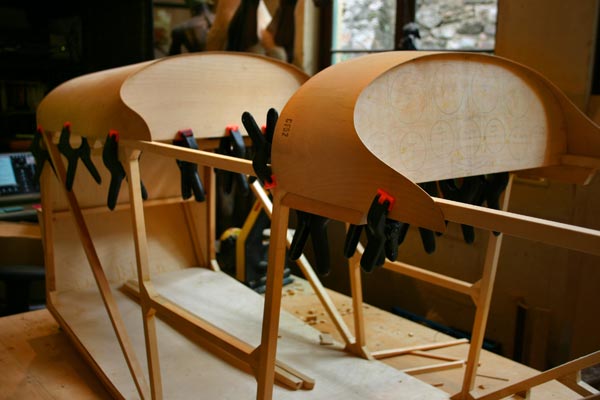
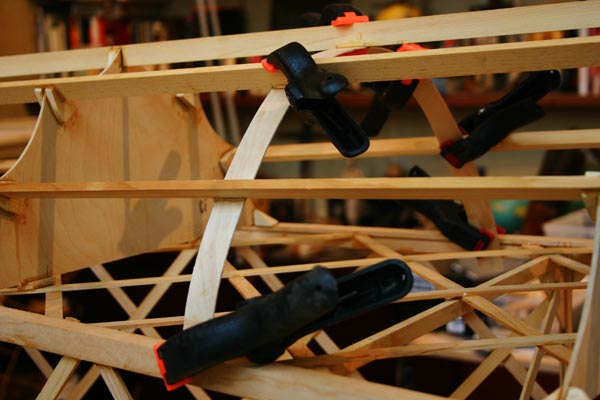
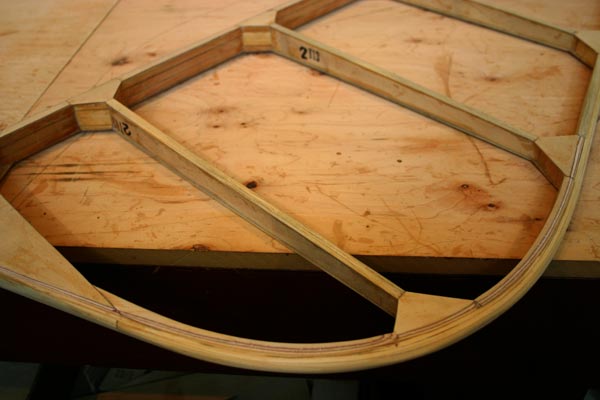
| Trimmed
scallops to fit and glue 1/16" turtledeck ends |
| Cut
1/4" threaded rods and glued them in holes to hold panel with
acorn brass nuts. |
Added
two 1/16" ply strips bent under stringers for added rigidity.
|
Put
tail feathers in place to fit hardware.
Sorted
out hardware for tail feathers assembly. |
|
|
6
hrs |
|
|
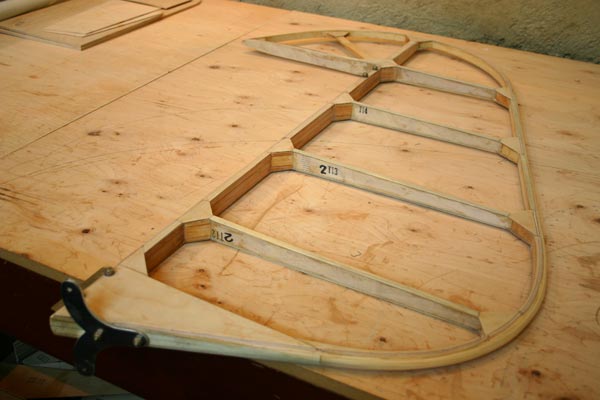
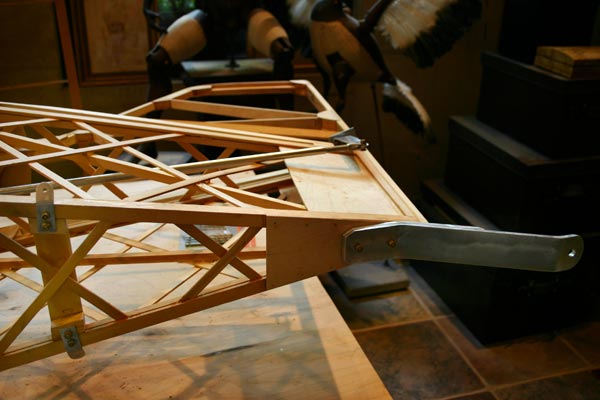
| 11 |
|
| Mounted
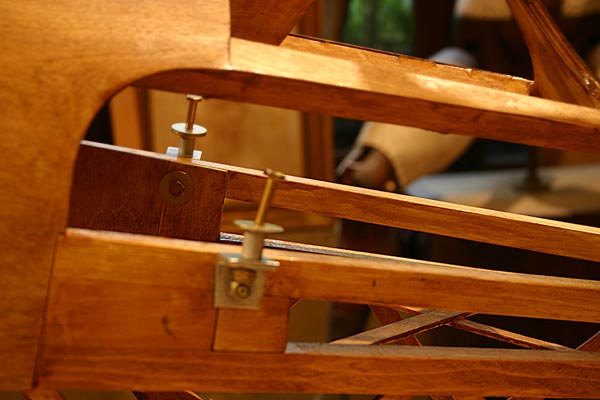
rudder horn. Added an aluminium backing plate. |
Added
gussets to front part of rudder.
|
| Added
1/16" rib caps and strips over edges to make everything
level to stretch the fabric on. |
|
|
4
hrs |
|
|
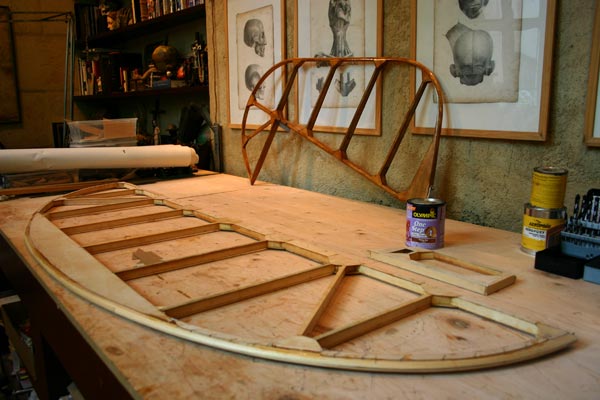
| 12 |
|
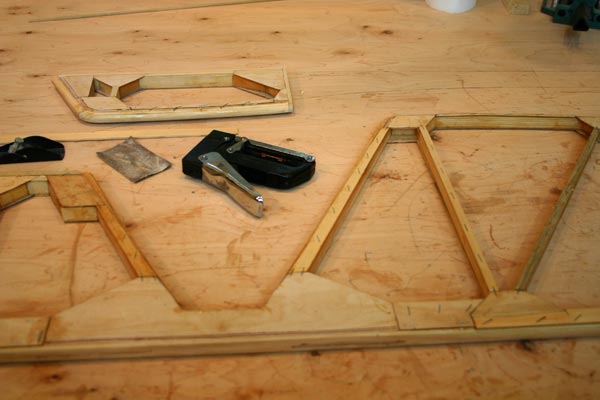
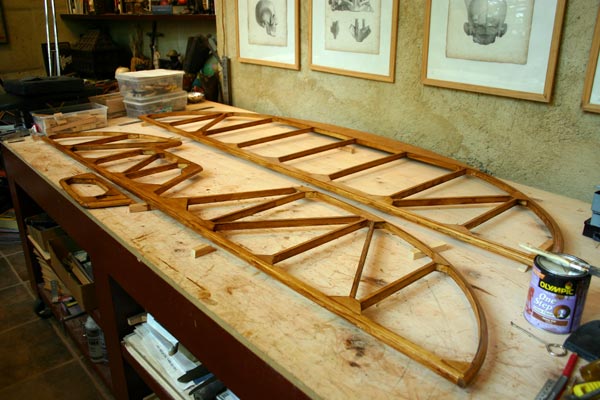
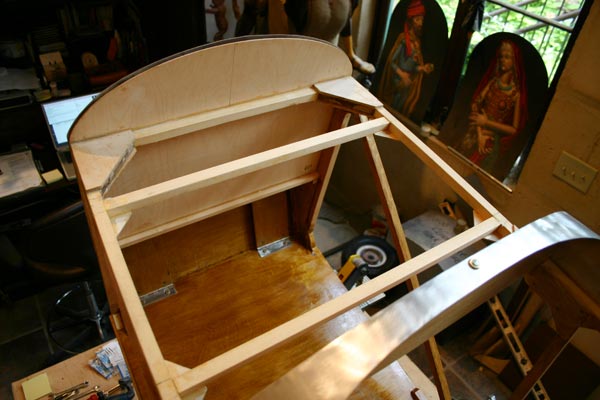
| Added
1/16" rib caps and strips to elevator. This will allow a smooth
fabric surface, as well as re-enforce ribs, and stiffen elevator. |
| Planed and sanded rudder smooth Planed
and sanded rudder smooth. |
|
|
4
hrs |
|
|
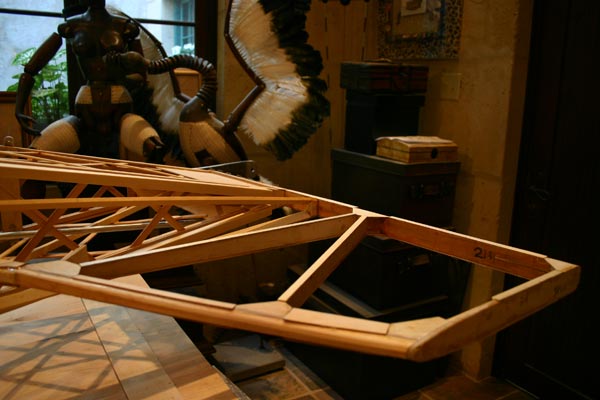
| 13 |
|
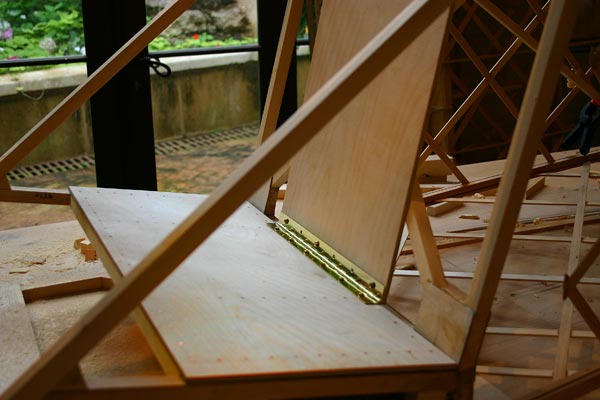
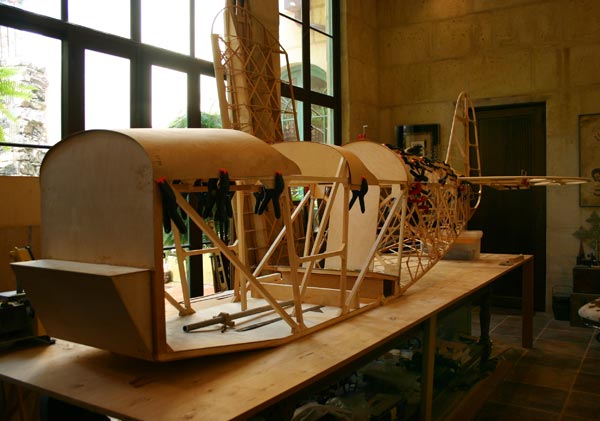
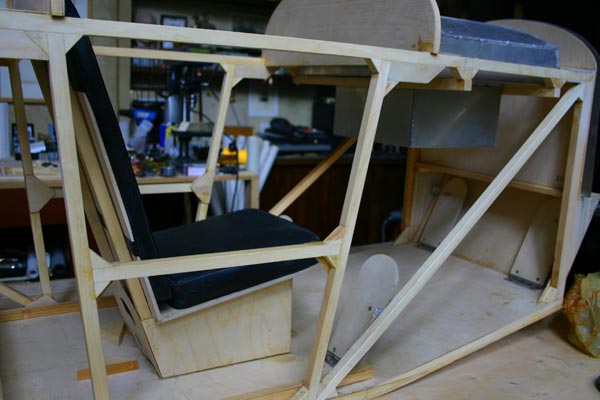
Glued
in uprights for passenger seat back to floor and back of panel.
Glued
together sides of seat. Glued
front seat in.
Added
gussets on inside of fuselage. |
|
|
6
hrs |
|
|
| 14 |
|
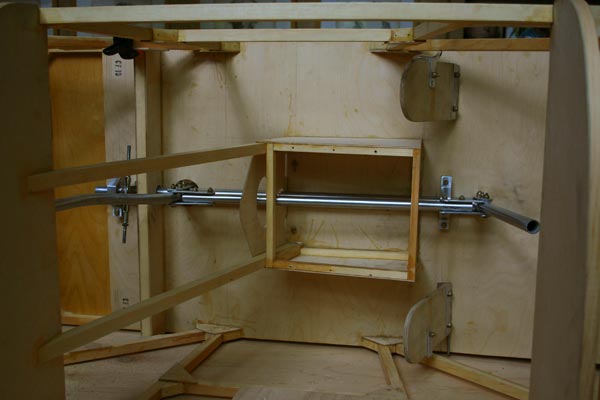
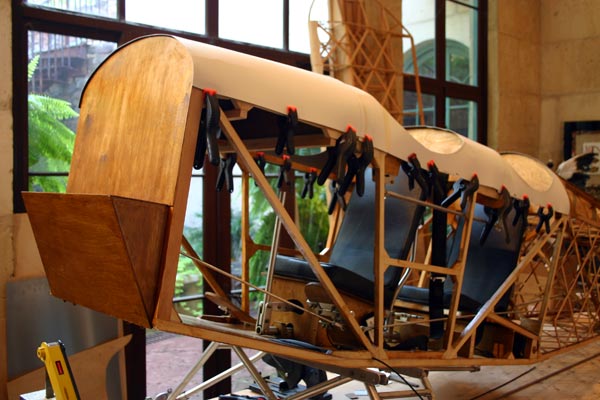
Fit
seat and back.
Started
drilling and assembling joystick and torque tube. |
|
|
6
hrs |
|
|
| 15 |
|
Worked
on joystick and torque tube assembly.
Made
and installed all 4 rudder pedals. |
|
|
6
hrs |
|
|
| 16 |
|
Finished
and polished joytick assembly.Turned fuselage on its side
to install it. Drilled floor and rear carry thru with hole
saws. Started installation .
Spacked
rudder with Aeropoxy Light. |
|
|
6
hrs |
|
|
| 17 |
|
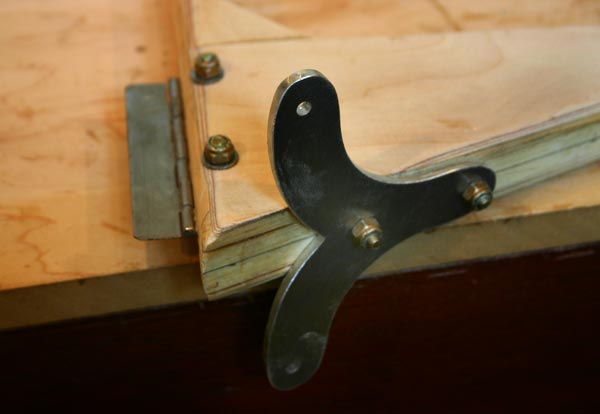
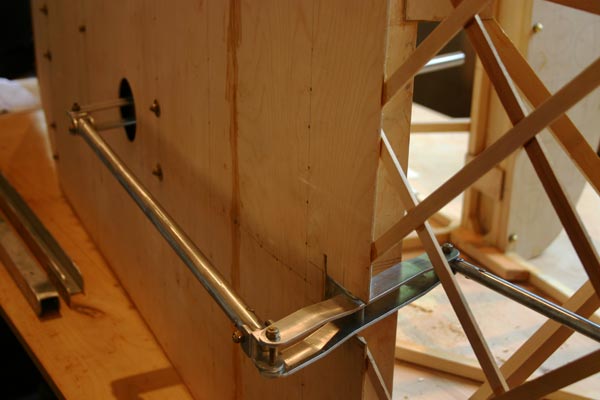
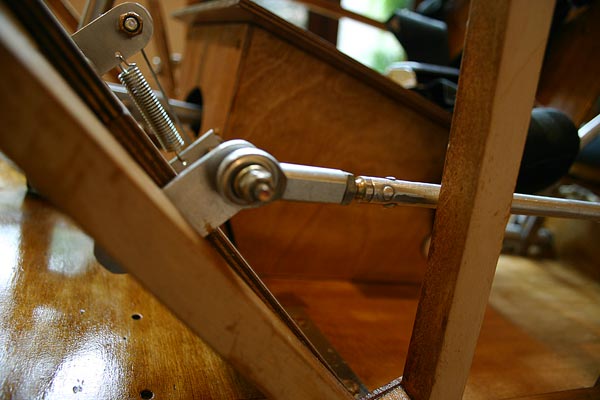
Glued
block to rear spar carry thru to attach elevator control
lever behind pilot seat. |
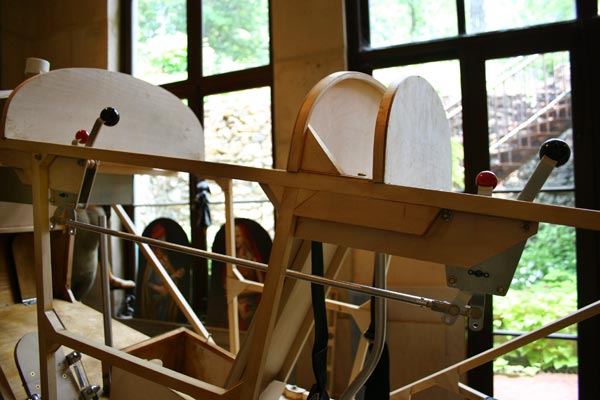
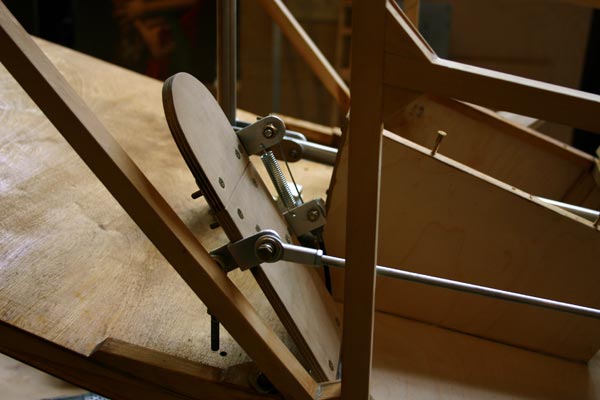
| Installed joysticks and elevator control rods. |
Installed
tail wheel support and stabilizer braces brackets on lower
longerons.
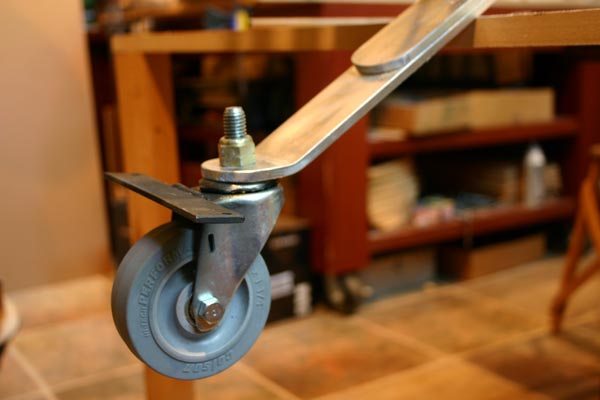
Disassembled
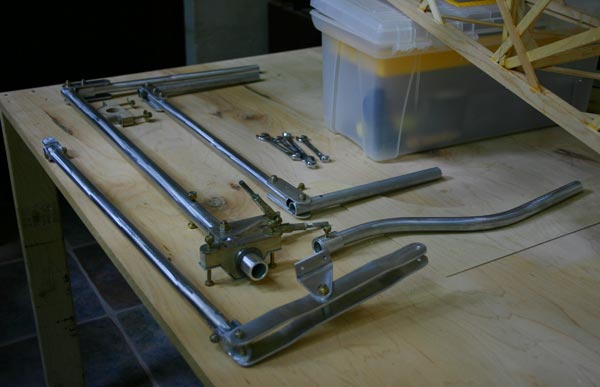
landing gear and started polishing parts. |
|
|
6
hrs |
|
|
| 18 |
|
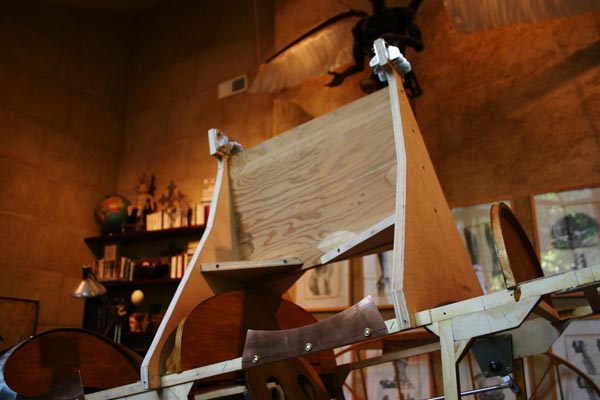
Added
1/16"strips all around edges of stabilizer.
Sanded
rudder and varnished it with Olympic poly-urethane varnish
stain .
Started
adding 1/16"strips to stringers on rear turtledeck. |
|
|
4
hrs |
|
|
| 19 |
|
Planed
and sanded 1/16" strips on stabilizer and elevator, spackled
with Aero-poxy.
Added
more 1/16" strips to stringers and tail fin.
Sanded
airframe, geodetic , etc...
Ordered
seat belts, Poly-fiber materials to test covering , replacement
aluminium tubing, throttle quadrants, and washers. |
|
|
8
hrs |
|
|
| 20 |
|
Sanded
elevator and stabilizer. Spackled other side.
Sanded
airframe.
Called
Fisher to clarify mounting of landing gear and position of
members on top of floor thru which it bolts. |
| Glued
those members on top of floor and directly above longerons
on each side. |
Added
large gussets to attach throttle quadrants I just received
from Aircraft Spruce.
Cut
slots for passenger seatbelt to attach inside panel.
Sanded
airframe. |
|
|
8
hrs |
|
|
| 21 |
|
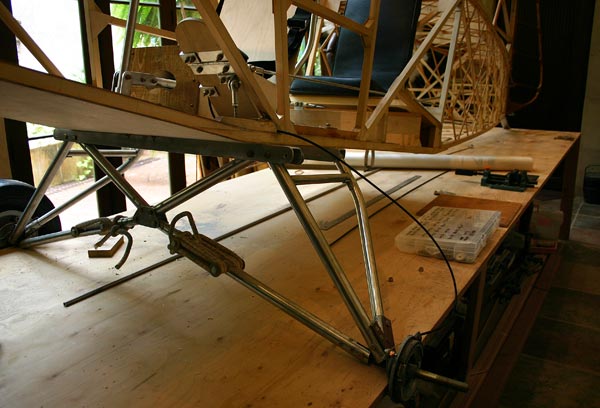
Mounted
landing gear on with only 4 x1/16" bolts. That somehow does
not seem like much.
|
| Installed
the pilot throttle quadrant using longer screws. |
Added
blocks and plywood backing to attach stabilizer.
|
|
|
4
hrs |
|
|
| 22 |
|
Installed
second throttle quadrant, and made linkage out of 3/8" tubing
and rivetted clevis forks.
|
Paid
a visit to Dick Simpson( he is my EAA advisor and is building
a Fisher Tigermoth himself) to look at his plane and pick
his brains. He has hydraulic toe brakes on his plane, and
I just adapted the pedals to my purpose.
He
used cables for rudder connections, and I know it is the
traditional way. But as an engineer , I can't help thinking
rods with ball bearing ends would give a better linkage,
so I rigged it my way and will let him and the guys look
at it Tuesday. |
To
test my theory without ruining an expensive 3/8" 6061T6 tube
, I threaded the ends of a 1/4" aliminum rod I had and screwed
the rod end on.
It
seems to work pretty good to me. |
|
|
6
hrs |
|
|
| 23 |
|
The
pedals were toofar forward, even for my long legs, so I moved
them 4" back to the next member in the floor.
Installed
brake cable between pedal and go kart drum brake. |
Ordered
4 Aurora bearings with a 3/16" hole and 4 rod ends to fit
3/8" tubing.
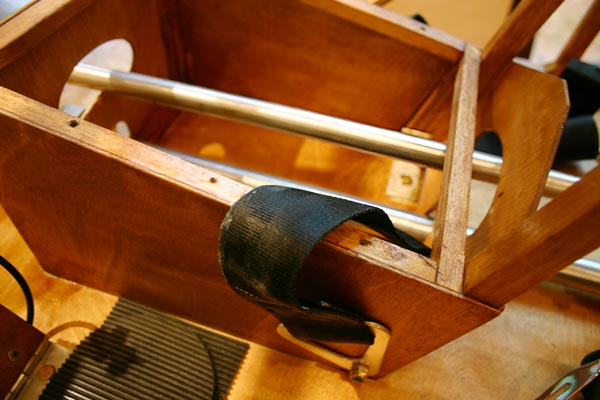
|
Installed
passenger seat belt as per plans. But the fit is awkward,
and I can't buckle the belt . I will have to use a cable
extension, or make anothe anchor point to the side of the
seat.
|
|
|
4
hrs |
|
|
| 24 |
|
Varnished
elevator and stabilizer with Olympic poly urethane varnish
stain to replicate the look of old orange shellac.
Sanded
and varnished forward floor section and pedals, as well as
the area of the front of the firewall to be covered with
metal. |
Put
a second coat on rudder. Spackled fin and turtledeck stringers
with Aeropoxy.
Glued
angled pieces in fin.
Loosened
up and lubricated stick assembly to move smoother. Could
still be better. Need to get teflon blocks for the
push rod to slide through. |
|
|
4
hrs |
|
|
| 25 |
|
Drilled
2 1/2" holes in seat backs. Varnished .
Linked
front pedal to back one . |
|
|
3
hrs |
|
|
| 26 |
|
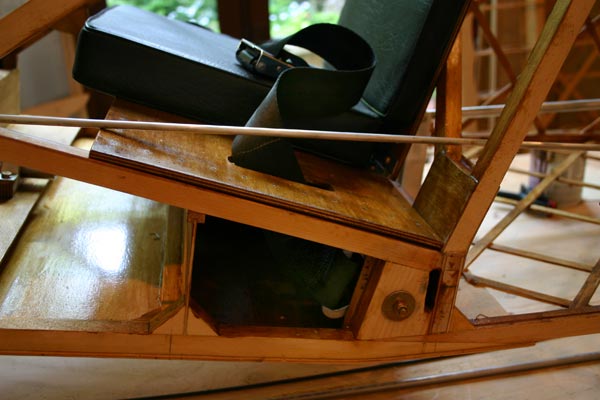
Sanded
and varnished floor and frame, panels , etc...
Cut
and installed angle brackets to connect seat belt bolt
under passenger seat to side of seat . |
Drilled
blocks for pilot seat belts and cut slots in seat to get
the belts through.
Cut
slots to attch rear spar to spar carry -through. |
Cut
and install new angle brackets to attach front of stabilizer.
The ones that came with the kit were drilled too close to the top.
Varnished
inside of geodetic and turtledeck, and fin. |
|
|
10
hrs |
|
|
| 27 |
|
Got
ready for first inspection by Dick Simpson, EAA advisor,
and John Burgin, field inspector for the FAA certification
. They looked the plane over, and seemed pleased with the
quality of the work. Dick will send a report to the EAA,
that he says should help me get insurance from them.
Installed
new tail wheel I had ordered from Fisher to replace the
flimsy grocery cart wheel that came with the kit. |
Bought
a few sheets a poster board and started cutting patterns
for the aluminum turtledeck panels. |
|
|
5
hrs |
|
|
| 28 |
|
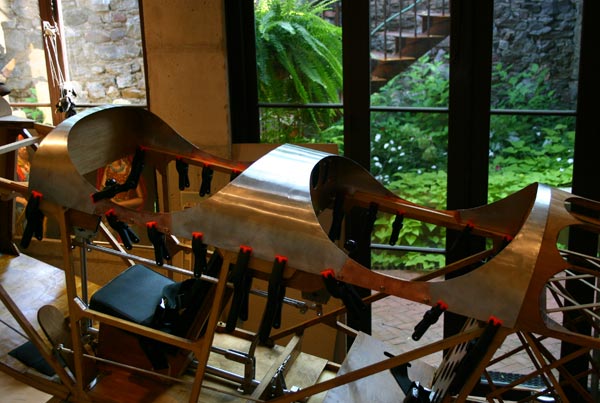
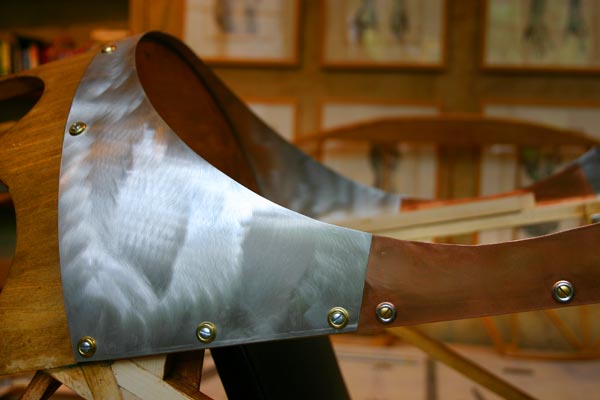
Cut
and fit aluminum turtle deck panels out of 6061T6 .032 .
Cut them with an air nibbler , and sanded edges smooth using
a particle board pattern to support metal.
Used
small copper side pieces with stainless finishing washers
and brass screws. |
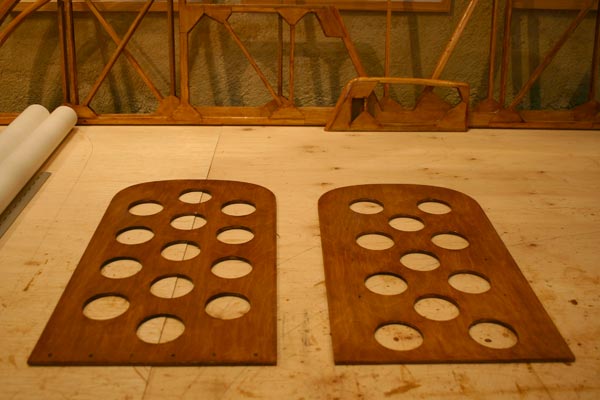
Cut
3 1/8" holes in panel with hole saw, and installed air speed
and vertical speed non TSO instruments from Aircraft Sruce.
Used small brass acorn nuts. Will add a 3/16" thick padauk
veneer. |
|
|
10
hrs |
|
|
| 29 |
|
Screwed
turtledeck panels down with brass finishing washers.
Decided
to use a lighter .020 weight 6061 T6 aluminum for the front
turtle deck , with supports over the gas tank. |
After
talking to Chuck at FFP, I cut out the dropped down gas tank
support members and raised them back up level with the top
longerons. That way, the stick doesn't hit the bottom of
the tank anymore and there is more room for my knees in the
passenger seat. Used 1/8" ply gussets under the members and
the longerons . |
Riveted
1/4" rod ens to 3/8" tubing with 470AD(hard) 3/32" aluminum
battering rivets for final left rudder connection.Used 2
at each end at right angle to each other. Moved
temporary rod to the right side to make rudder functional
and test the pedals. It gets a little too far for the toe
brake when the rudder is all the way on that side. The pedals
may have to move back a little more, or the connecting rod
will have to be shortenned some to bring the pedals back.
I may move the connecting bracket up to shorten the travel
of the pedals. |
Mounted
the three steel hinges on stabilizer and elevator.
Made
trim tab cable brackets.
Sorted
out the pieces for the cabanes. |
|
|
8
hrs |
|
|
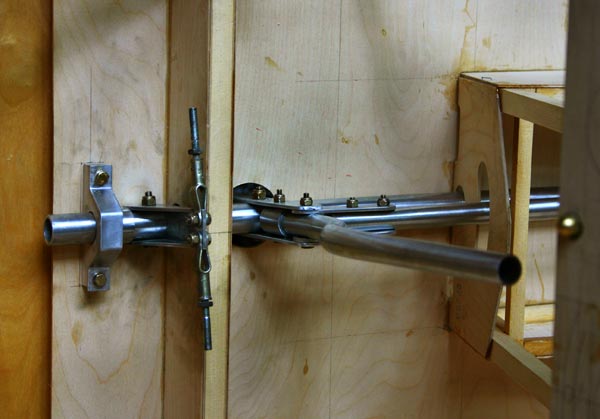
| 30 |
|
Polished
and shaped all brackets for cabanes, cleaned up tubing.
Cut
and assembled cabanes jig out of straight 3/4" plywood. Added
plywood squares.
Fitted
jig on top longerons 25 5/8" back from firewall. |
Got
some good black rubber pipe insulation and experimented with
lacing a padded leather trim around the cockpit openings
through 1/8" holes drilled along the edge of the metal turtledeck
pieces. Tje smaller one will be my choice, using short pieces
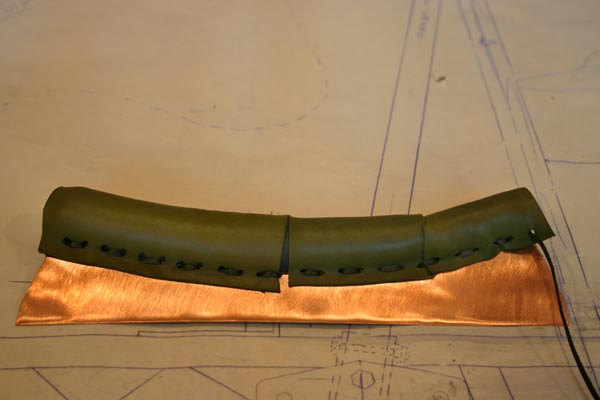
of soft leather stitched end to end to follow the curve. |
|
|
8
hrs |
|
|
| 31 |
|
Polished
tubing for cabanes, attached doublers on end with 1/8" pop
rivets.
Put
in place brackets with one bolt only, placed tubes ,
drilled and assembled cabanes, except for the front top
brackets which I find too small. Notching that heavily
doubled front tubes to fit would leave so little material
it would not be safe in my book. I will order some 1" channel
and make slightly larger brackets.
|
Had
to move back the gas tank that I had just moved up. Will
rebuild the support members. |
|
|
4
hrs |
|
|
| |
Total
Hours so far |
308hrs |
|
|
|