|
| C
O N S T R U C T I O N L O G |
|
| A
P R I L 2 0 0 5 |
|
 |
| Back
to work on the plane after almost two months away. 1000 hours even
spent on the project so far... |
|
| 11 |
|
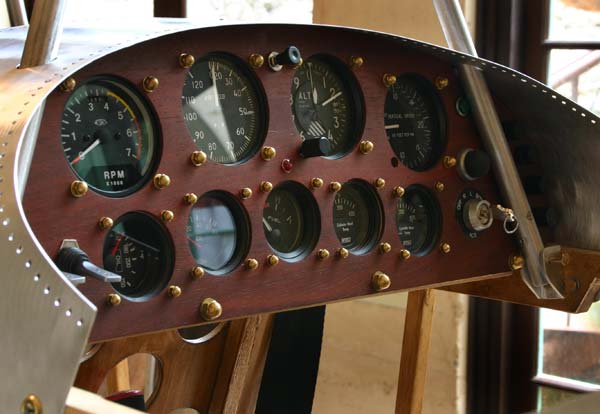
| While
I was away , the custom tachometer arrived from Westach,
and the Mitchell replacement oil temperature gauge with the
lower range. The special order metric senders were not here,
and I called Aircraft Spruce today to have them ordered.
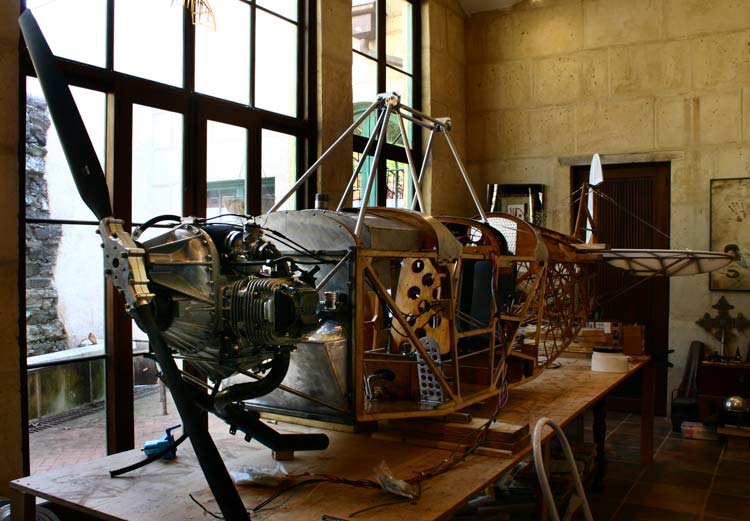
I
installed the tach and the gauge in the panel, and put the
cowling and cabanes back on. |
| I
had to cut off the bottom spacer on the engine mount that had
been welded on by mistake. Also cut the lower right 1/2"tubing
brace to move it back a couple of inches to accomodate the
exhaust manifold. |
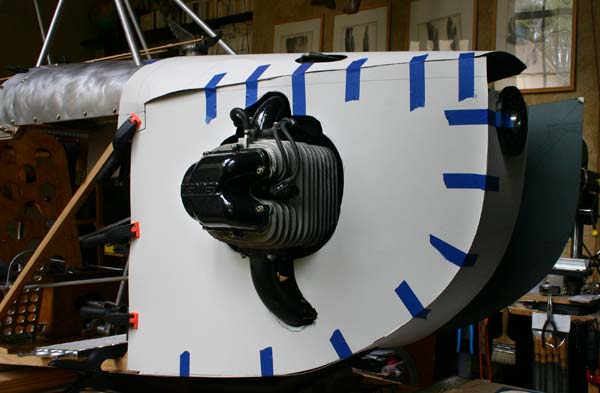
| Got
4 sheets of cardboard from the art supply, and started working
on the patterns for the aluminum engine cowling. First
did a rough fitting for the top, bottom, and a side with a
cut out for the cylinder. Kept trimming and adjusting the fit
on one side until it worked. Then, cut the other side to match,
except for the left cylinder cut out being forward about 3 inches. |
|
|
8
hrs |
|
|
| 12 |
|
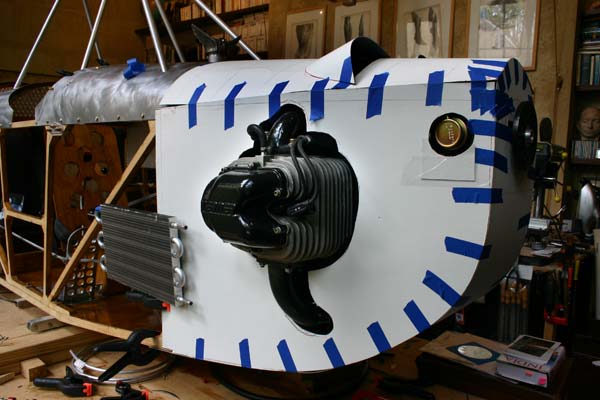
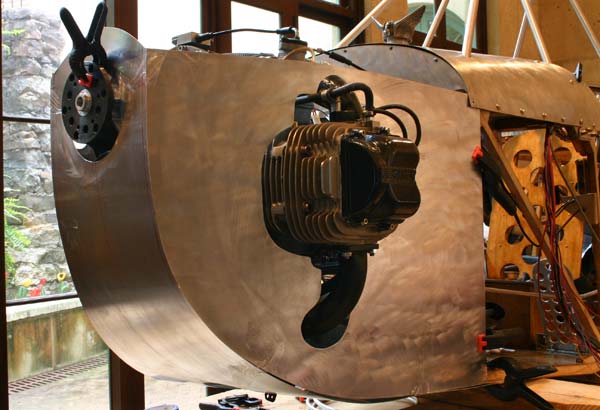
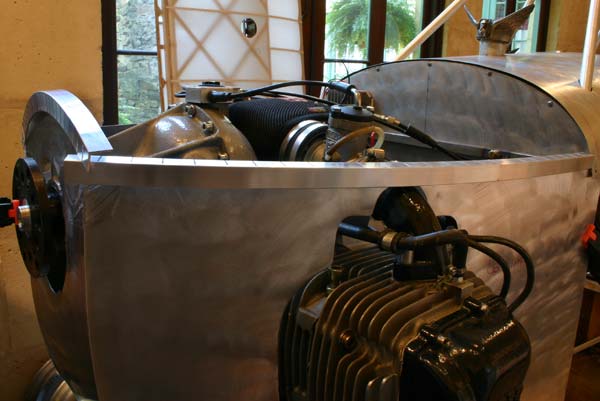
I
really like the look of the narrow pointed cowling with the
engine hanging out, but it does not leave a good space for
the oil cooler except may be behind the engine against the
firewall, with a scoop and a duct to get the air though it.
So
I am seriously considering mounting it on the outside of
the fuselage, like some early planes I saw at the Museum
in Paris. I am not sure if it would cool better installed
vertically or horizontally... It may need a little scoop
too, like the
two I did to fit the carburators, and to direct air to
the air filter.
|
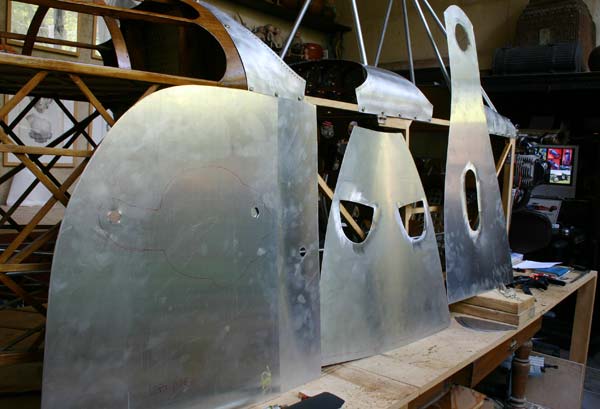
| I
went by the tin shop to see if they could weld .032 aluminum,
and although difficult, they think it is feasable. So I bought
a 4x6 ft sheet of .032 gauge 3003 aluminum, traced the cowling
patterns on, and cut them with my air nibbler. I cut the bottom
piece
about 3/8" bigger to make the welding of the side pieces
to it easierby butting them to it . Sanded the edges straight
and smooth , cut out the holes for the muffler and the scoops,
cut the two scoops in scraps. |
|
|
8
hrs |
|
|
| 13 |
|
I
refined the tracing of the cutouts for the cylinders, and nibbled them off. Ground
edges smooth .
Tried
them on for a fit . Some may find it too boxy, but I like it
a lot. Much nicer then "plastic"! And it is in keeping with
the look of the square fuselage. |
I
took my cowling panels to the tin shop, but now they don't
think they can weld .032 aluminum. The .060 could be welded,
but that is twice as heavy.
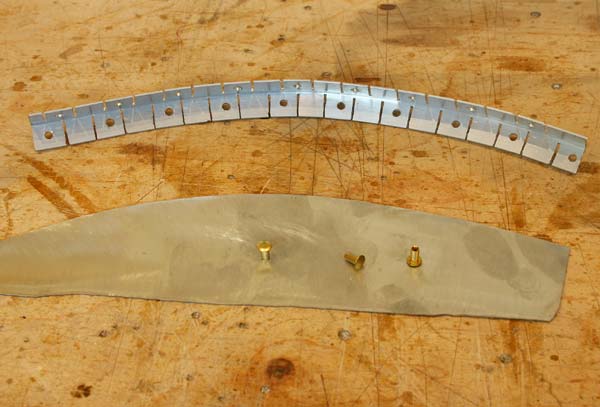
So I went to plan B, which is
rivetting the pieces together.
I could use a whole bunch of little brackets, but I figured
out a better way .
I got a piece of 1/16" thick 1/2"x1/2" angle
aluminum, and slit each side every 1/2", with the slits staggered 1/4",
so it bends smoothly both ways without breaking. |
I got an assortment of rivets from
the hardware store
, brass, aluminum, and copper, and tried them. The solid copper or aluminum
rivets are too
hard to batter being so close to the side of the 1/2"bracket
.
The 1/8" tubular brass rivet can be battered
easily, and looks the best anyway. But they are plated brass,
so it took me a while to hunt down some solid brass ones. Nothing
locally, but a Google search came up with some suppliers. I ordered
500 from Hanson
Rivet & Supply Co . I will have to work on the wings
while they come from California...
|
|
|
6
hrs |
|
|
| 14 |
|
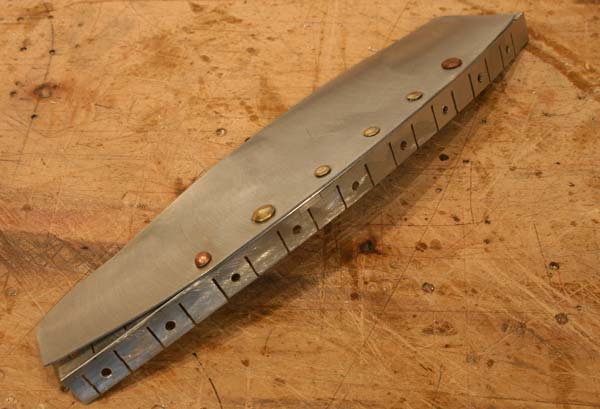
Fabricated
the two slotted flexible aluminum angle strips to join the
engine cowling bottom and sides.
|
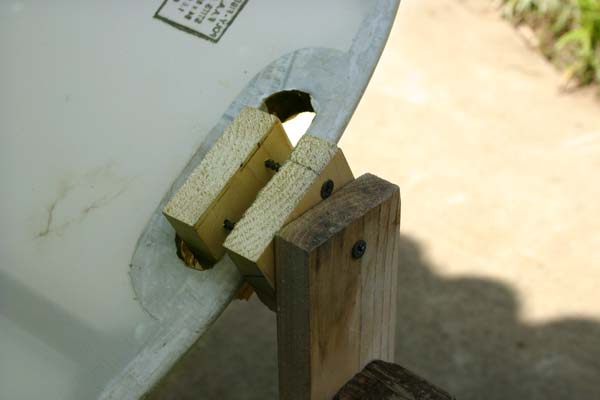
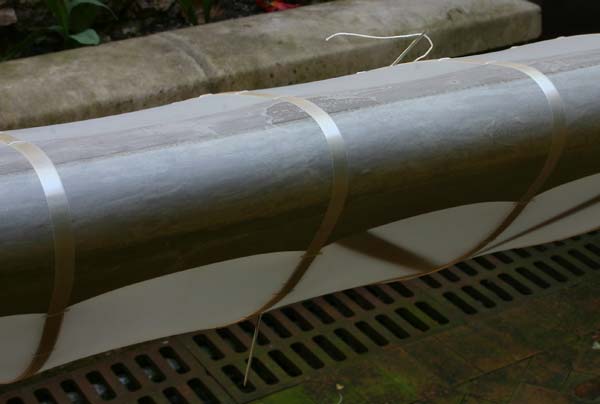
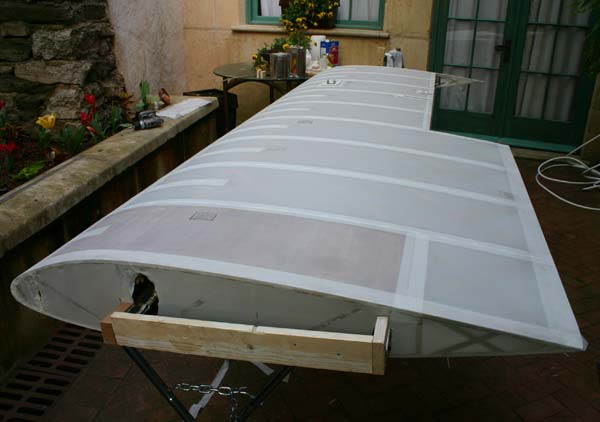
| Made
a simple wood contraption attached to horses to hang the wings
on and have them rotating . |
Punched
all the lacing holes with a needle using a pattern marked
with appropriate spacing for top and bottom on pieces of
tape . That kept from snapping chalk lines on the fabric,
since it will not be painted. |
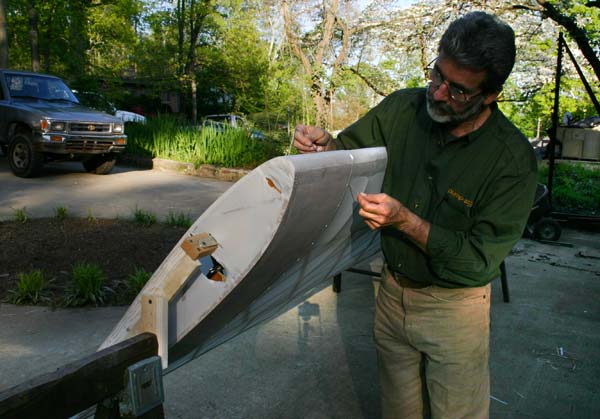
| Started
lacing with a straight 9" needle, using single laces with a
plain square knot and a single knot on each side. Each knot
is pulled back to the inside of the wing. I find it easier
than twisting the cord around the needle every which way to
do the continuous Seine
knot lacing. |
Being
able to rotate the wing effortlessly makes it easy to push
the needle through from top to bottom, bottom to top, make
the knot, and again top to bottom to pull the knot inside.
Half of the rib can be done from the leading edge side, the
other half from the trailing edge side. |
|
|
8
hrs |
|
|
| 15 |
|
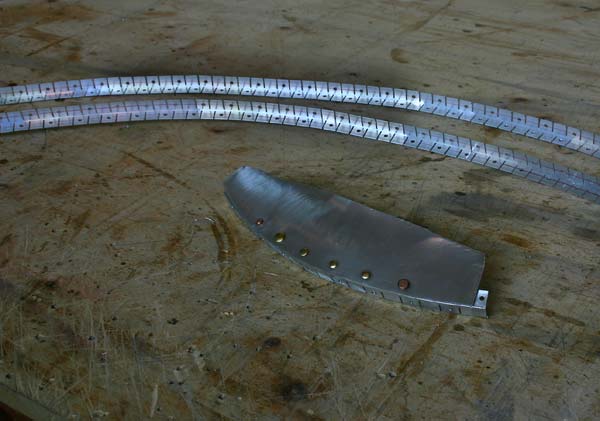
I got
a piece of1/16"thick 3/4"x3/4" angle aluminum, and notched
it every 1" on one side only to fit the curve of the top
cowling panel . The top of the side panel is straight.
Then notched
another piece every 1/2" for the sharper curve of the cowling
above the prop. I ran it back through the band saw a second
time after the first bent, to make the notches wider and bend
it some more.
|
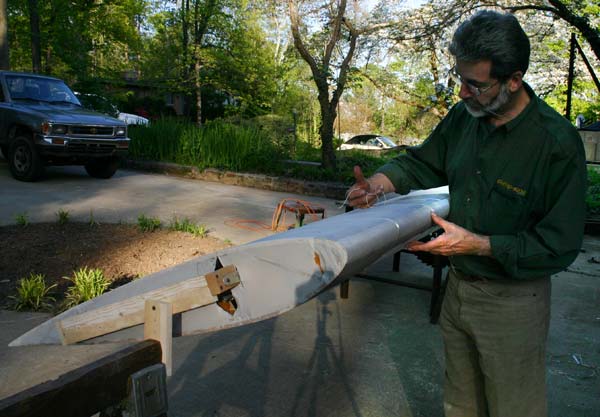
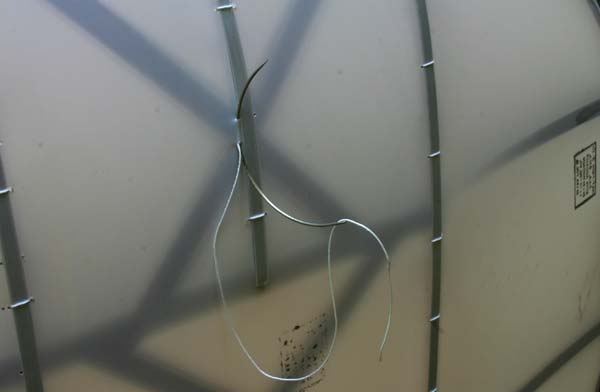
| Spent
the rest of the day rib lacing the first wing. Most laces just
require the straight 9"needle as I expected, but the geodetic
was in the way in a couple of places, and I had to thread a
curved needle (made from a straight 9"needle) over to another
hole on the next rib and back through the same hole to the
other side. |
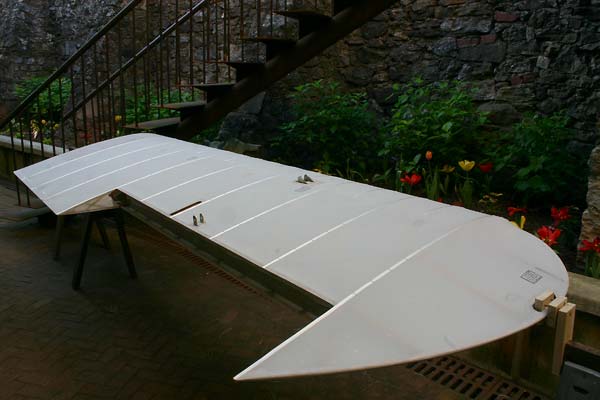
| A
small curved needle let me thread the cord back to the proper
hole when I had to punch an extra hole a few inches down the
rib to avoid wood. |
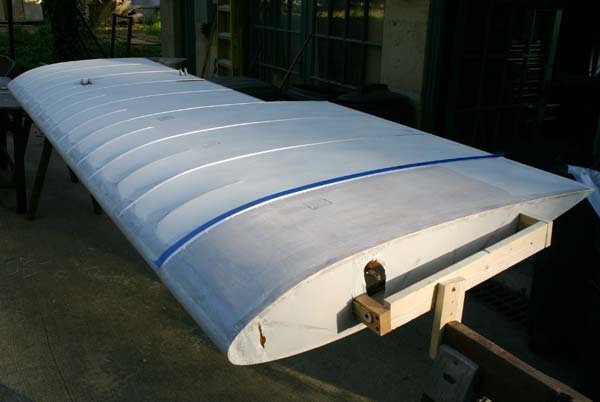
Here it is, the first wing is laced, and marked with a light
pencil line 1" on each side of each rib, to serve as a guide when I glue the
2" tape over the stitches to morrow. |
|
|
8
hrs |
|
|
| 18 |
|
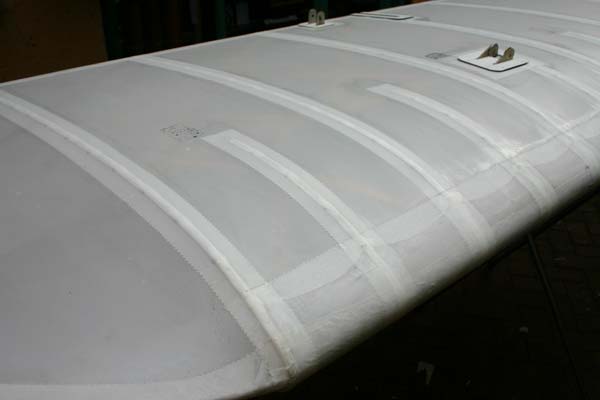
I taped
over the rib laces with 2" light weight Stits tape, then
taped the trailing edge with 4" tape , and the edge of the
aileron bay with 2" tape. |
Cut
a 7 1/2" strip of fabric from the scraps with pinking shears.
I actually bought a ratchet Florian pinker to cut a neat continuous
edge, and found it did not work well at all. So I went back
to the plain pinking shears and did the best I could. Actually
, a slightly messy job makes it look more vintage!
Anyhow, I glued the strip to the leading edge. |
I
cut patches to cover the bracket plates and the aileron push
rod opening.
Then
cut some cardboard patterns for the metal plates that will
trim the areas. I have not decided yet whether to make them
from plain aluminum, or copper, or brass.
|
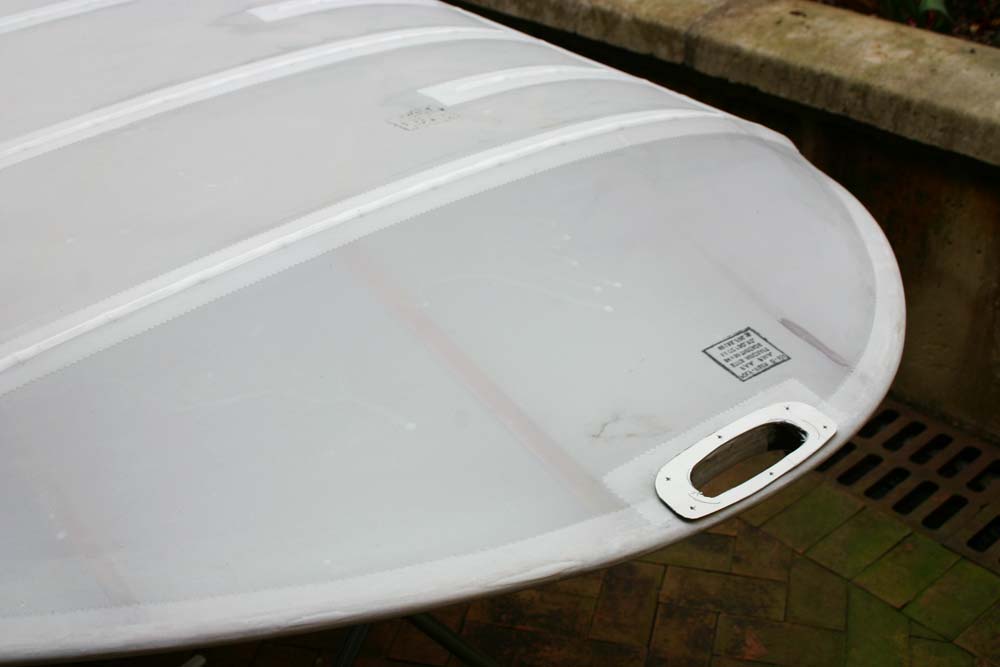
I cut some 3" bias strips from the new bolt of fabric. I taped
the wing tip with it.
Made a pattern for the plates that will trim
the wing tip handles. |
|
|
6
hrs |
|
|
| TOTAL 1036hrs |
|
|