After reading the Verner manual and talking to Steve Flynn at Florida Flyers about procedures( he has more experience with the Verners than probably anybody in the US, and sold me the engine), I drained most of the storage oil out and poured in 4 quarts of the best Harley synthetic oil. I temporarily attached the oil cooler to the front crossbar of the motor mount and connected the 2 hoses to it so I could test the engine with no cowling. I took the 4 plugs off, and poured about 2 tablespoons of heated thin compressor oil in each cylinder. I turned the prop over by hand a dozen times. I connected my starter battery pack from Harbor Freight to the terminals on the side of the fuselage, flipped only the main swith on, and turned over the engine with the starter for about a minute to loosen it up and wash the storage oil from the cylinder walls, and to circulate the oil through the motor and the oil cooler. Put the plugs back on.
I looked the engine over, and noticed I had not connected the second terminal of the oil pressure sending unit. The Verner wiring diagram shows it connected to the +12V, but the Mitchell web site to the ground. I went with Mitchel, and added a ground wire.
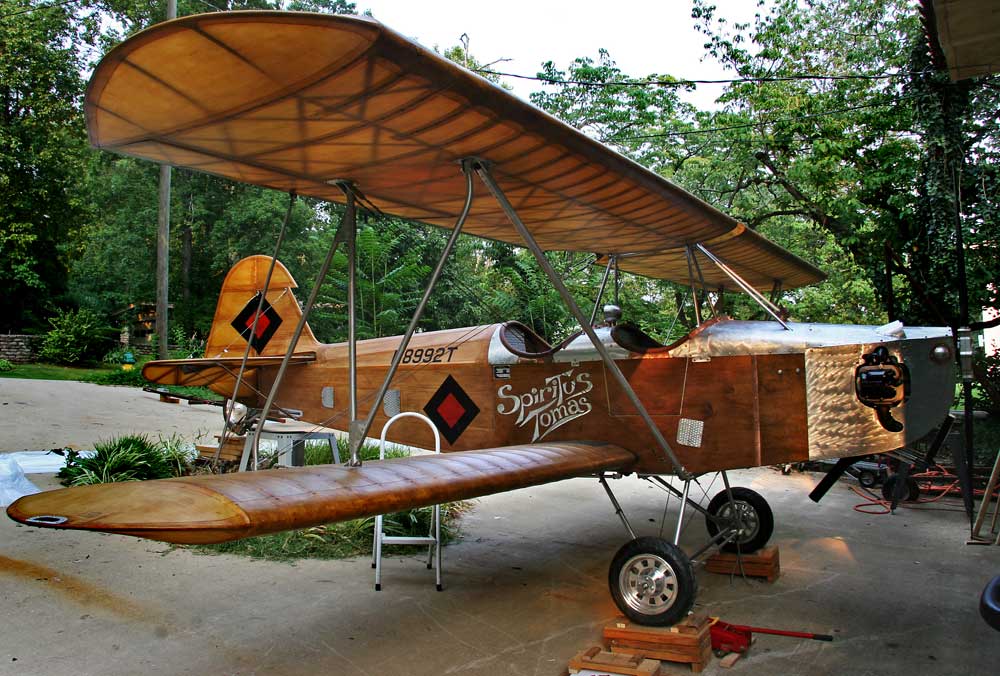
I took the fuselage out of the workshop and tied the tail to a hinge on the door frame with wire. I poured a couple of gallons of gas in the tank. Moment of truth, main switch on, alternator switch on, contact with both coils on, starter button...
After about 3 revolutions of the prop, the engine starts in a big puff of smoke, and is running smooth, but the oil pressure gauge shows no oil pressure, so I shut it off. In doubt about the wiring, I choose to remove the sender and use instead the low oil pressure warning light and switch supplied originally with the engine. When I crank it up again, the engine fires instantly, and the oil pressure warning light goes off immediately. It runs smoothly. But the tach reads twice the RPM, so I will have to cut the little wire loop in the back.
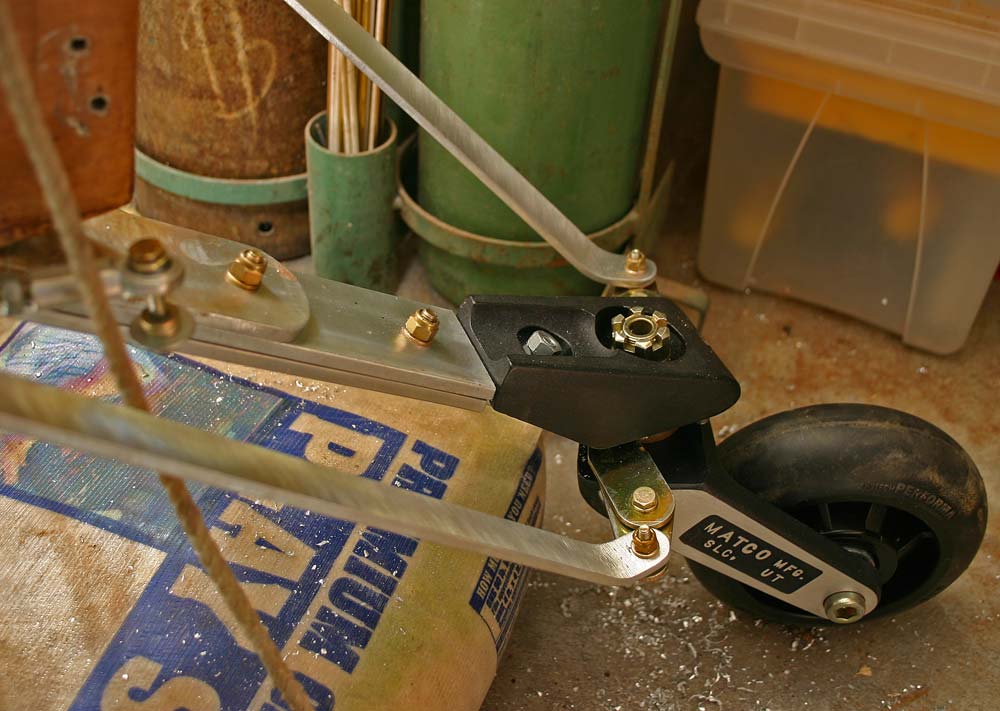 |
I received the Matco solid rubber tail wheel fom Aircraft Spruce, and it is solid and heavy, good ballast! At first could not figure out how it worked, and considered modifying it with a simple aluminum bracket. I ended up using the whole thing as is, and mounting it to the existing 2" x 1/4' aluminum spring with a 2" x 1/4" aluminum bar extension slightly bent to keep the axle vertical. It extends a little further back than the smaller original tail wheel, which is good. I made 2 new connecting rods out of heavier 3/4" x 3/16" aluminum and eliminated the springs altogether. |
22 hrs |
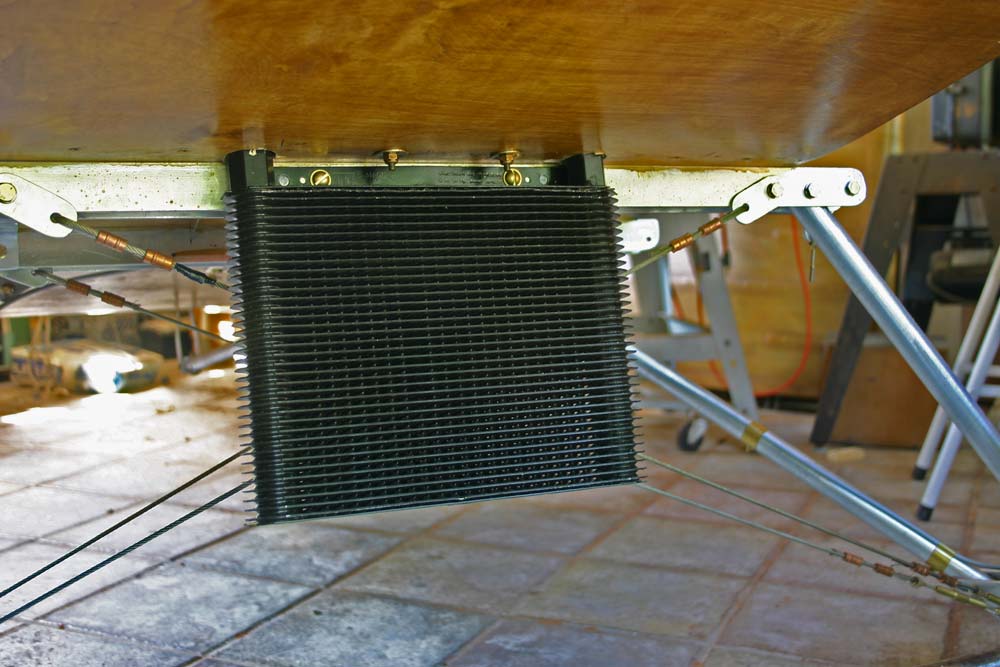 |
I also decided to move the radiator back from right against the prop to the front of the landing gear, as suggested by my friend Dave. It will help a little to move hte CG back, and make it easier to take the bottom part of the cowling out. I drilled two 1 1/4" holes though the fuselage floor for the oil inlet and outlet of the radiator, and bolted it to the U channel holding the front legs of the gear. |
2 hrs |
 |
To run the oil hoses from the motor to the cooler, I drilled 2 holes through the firewall and used two regular 90º fittings (the bulkhead type was just too expensive at $34 a piece). I cut the existing hoses to fit and attached them with clamps. I ordered 4 ft of hose to run the two 24" sections inside the fuselage. | 2 hrs |
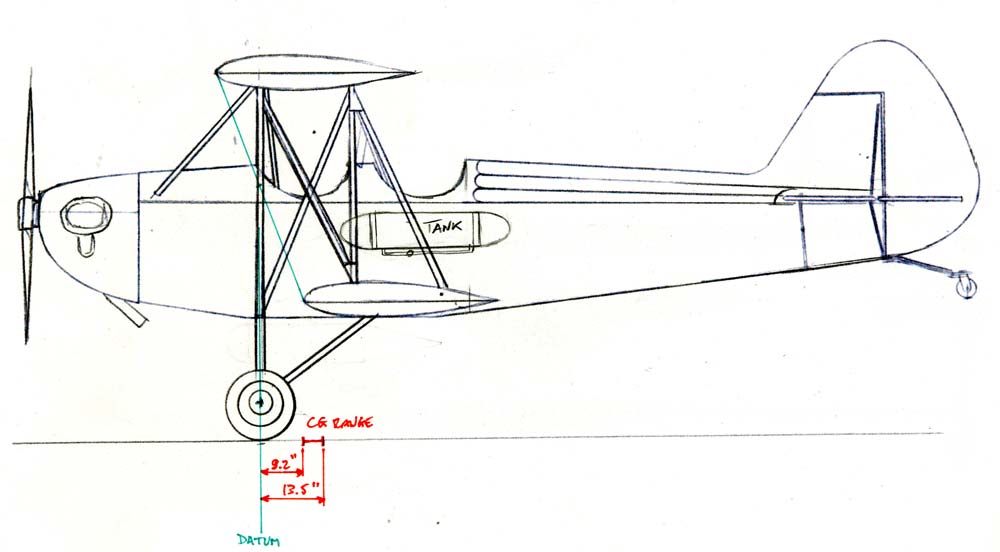
I am back thinking about the external gas tanks to solve the CG riddle, and have a new idea that might just work. The plane is heavier on the right wheel by about 6 lbs. That is a lateral moment of 6 lbs x 33"= 198. Why not use only one 4 GL exterior tank attached fairly far back on the left side of the fuselage? The weight of the gas and tank would be about 25 lbs, and that would be an opposite lateral moment of 25 lbs x 16"= 400, a left moment just as if the heavier wheel was on the left.
The center of that gas tank could be placed as far back as 36" from datum, creating a favorable backward moment of about 25lbs x 36"= 900, which would move the CG almost 1". Moving the oil cooler from the front of the cowling(about 46" forward of Datum) to the gear (about 3" forward of Datum) already moved it about (4 lbs x 43") / 936 lbs= .18". The heavier tail wheel also moved it back about (5 lbs x 146")/936= .8" , for a total of 2", almost enough. We would be within range with the front tank no more than 3/4 full, which would move the CG back about (12 lbs x 16")/936lbs = .2"
The next weight and balance will hopefully confirm those rough figures.
| I went to an aluminum spinning factory, and they actually gave me four 6.5" parabolic bull noses that will be perfect to make a tank if I connect two of them with a 6.5" x 24 " cylinder . It is strong enough, but probably too thin for me to weld. I am wondering if I could roll a piece of aluminum on a wood jig at the correct diameter, and rivet the whole thing using siicone to seal the joints...I would also have to find some flanges to attach the gas lines to and from the tank, and an extra probe for my gas gauge or a mechanical gauge ... | 2 hrs |
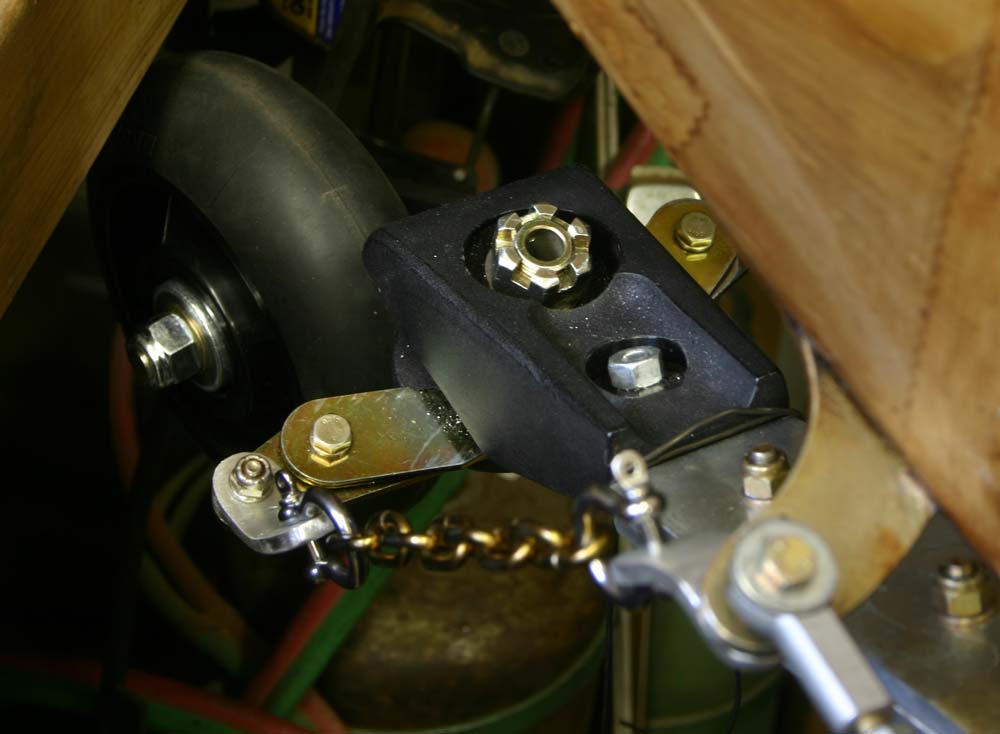 |
I made two aluminum brackets and connected the tailwheel to the rudder horn with a stainless steel welded chain and small stainless steel shackles. | 2 hrs |
 |
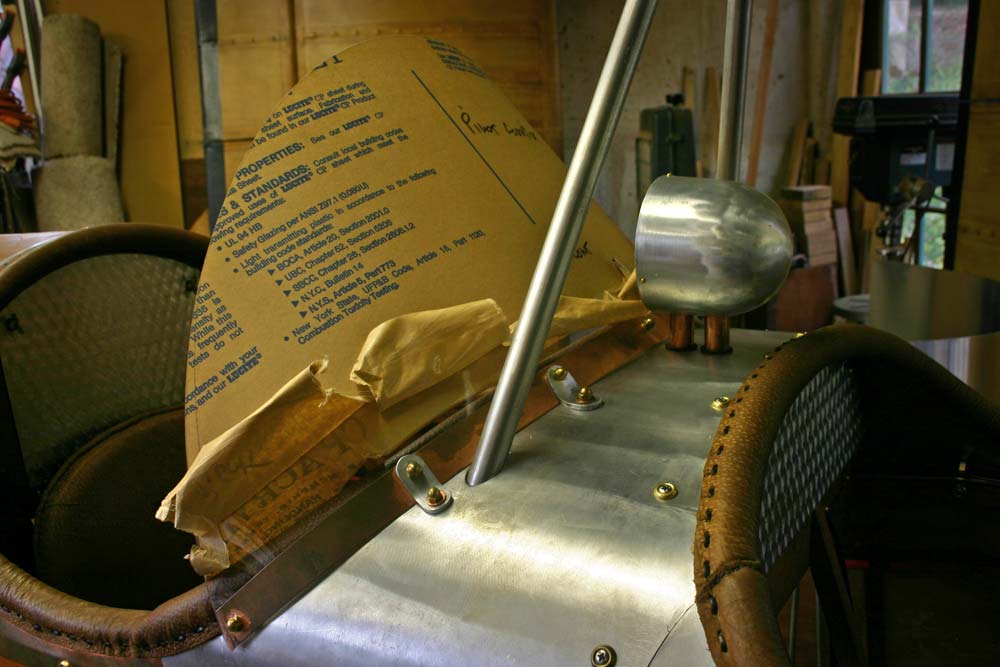
I installed the front passenger plexiglas windshield. | 2 hrs |
 |
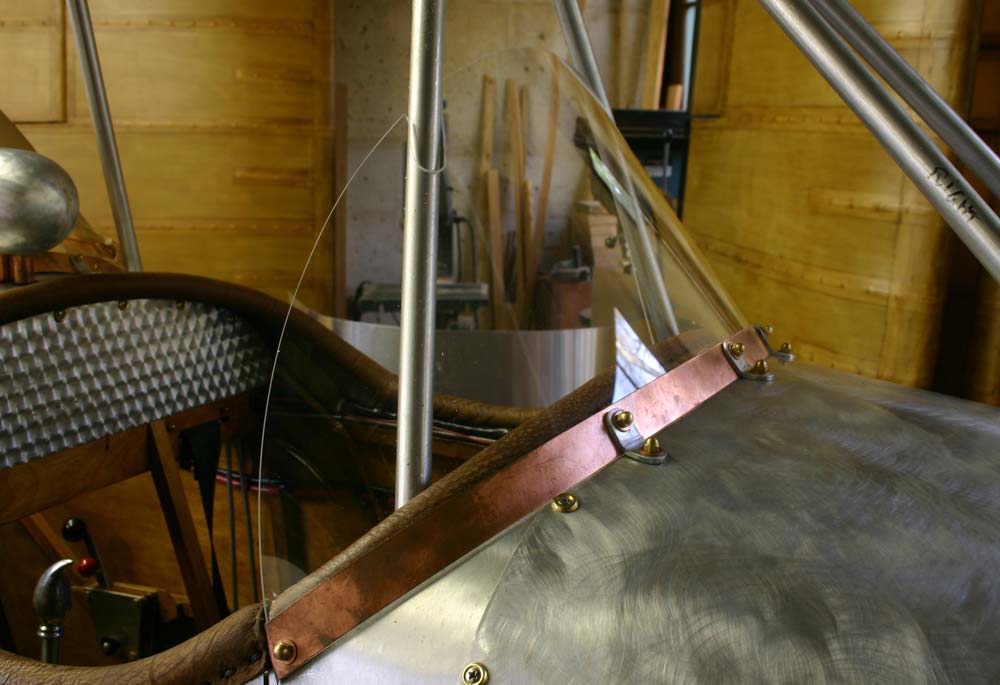
I installed the pilot windshield. | 2 hrs |
| L A S T M O N T H | B A C K T O I N D E X |